WEEK
TWELVE
Molding and Casting
Task for this Week
Group Assignment
Review the safety data sheets for each of your molding and casting materials, then make and compare test casts with each of themIndividual Assignment
design a mold around the stock and tooling that you'll be using mill it (rough cut + three-axis finish cut), and use it to cast partsGroup Assignment
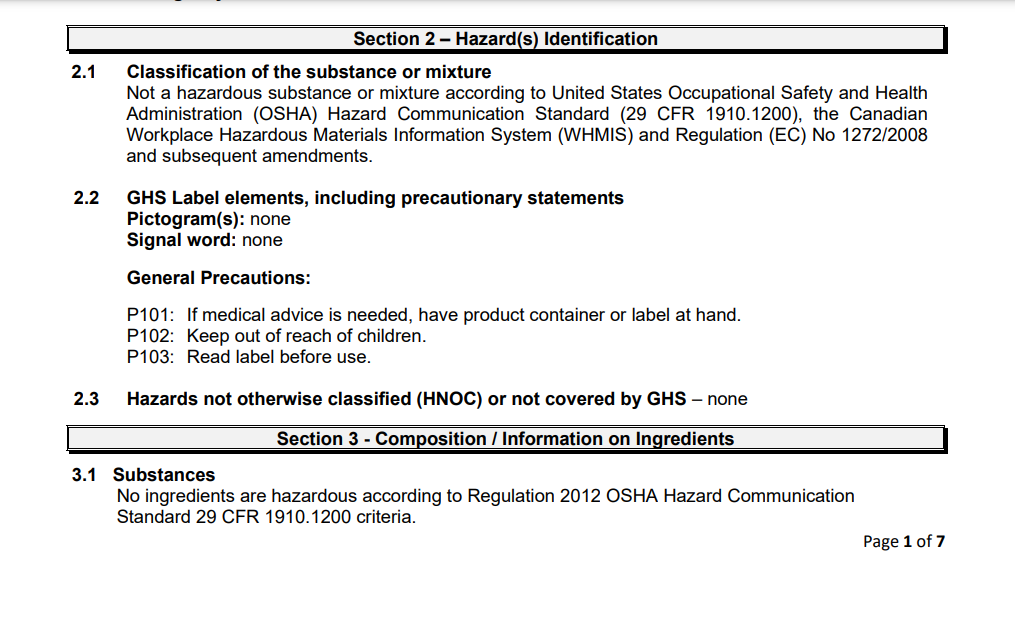
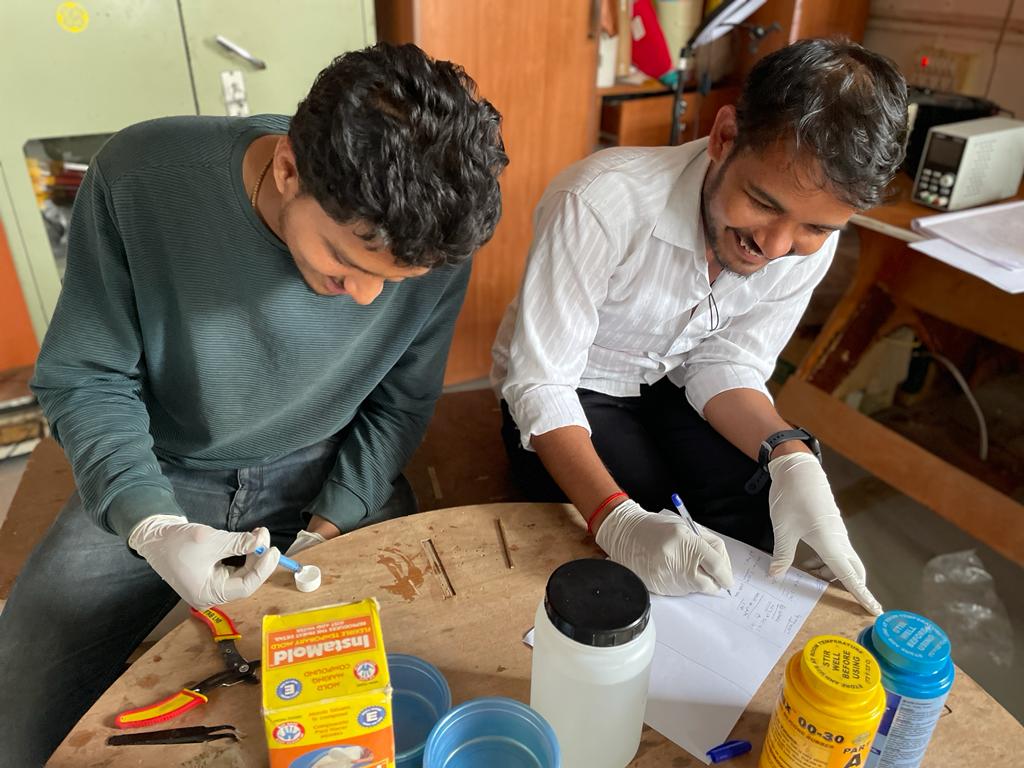
For the group Assignment we have to Read the safety data sheet of the molding casting material we have, because every material have some propertiesand some material may be hazard for our body.
Smooth-on Ecoflex-00-30
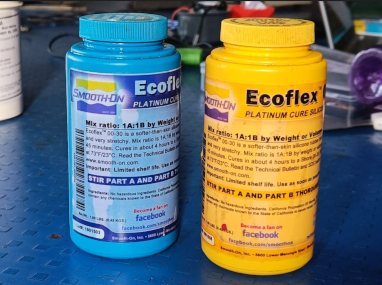
The first material we Smooth-on Ecoflex-00-30 product . This material are used for making the mold of the design. We have to mix the two Liquid
to make a perfect mold. This product come in two parts -Part-A and part- B. we have to mix this parts in 1:1 ratio by weight or volume.
The cure time for this material is about 4 Hrs at 23 C temperature. After the cure time it become like rubber.
Safety
We have a proper ventillation area at the time of working and Mix properly at a Room temperature. Rise in temprature may affect its cure time and life.Its not hazard for our body but we have to always take it by safety. Dont use a rubber glove while using because it can affect its properties
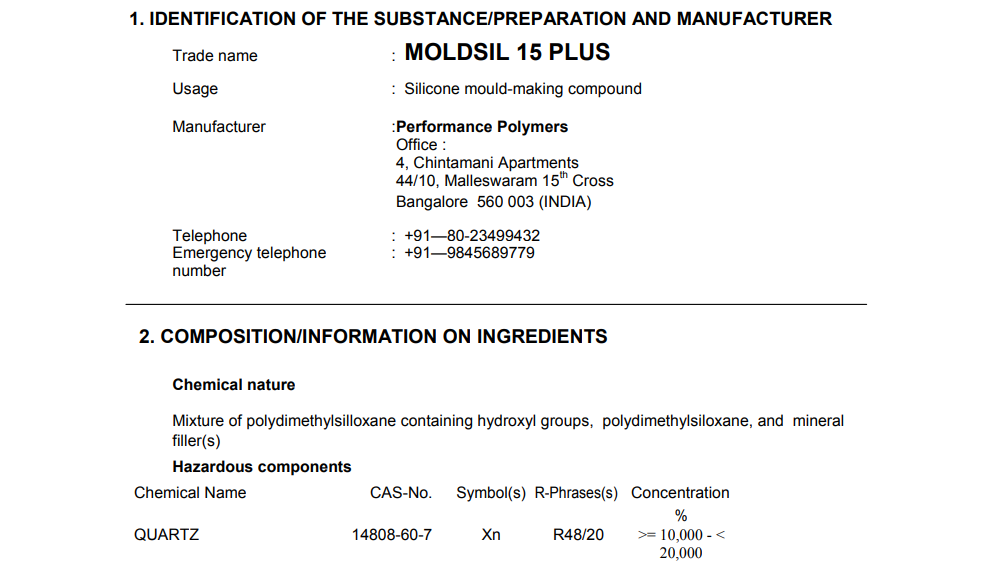
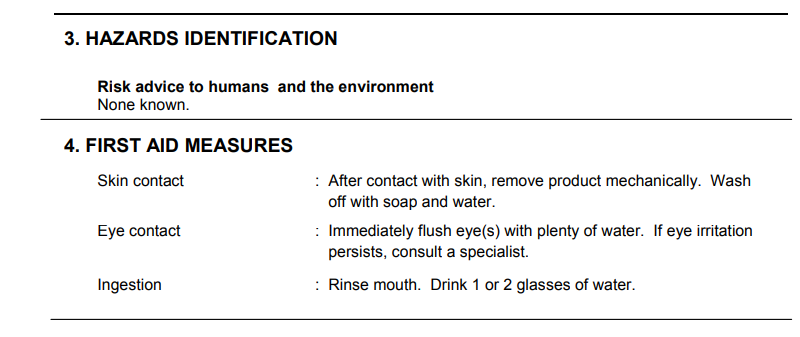
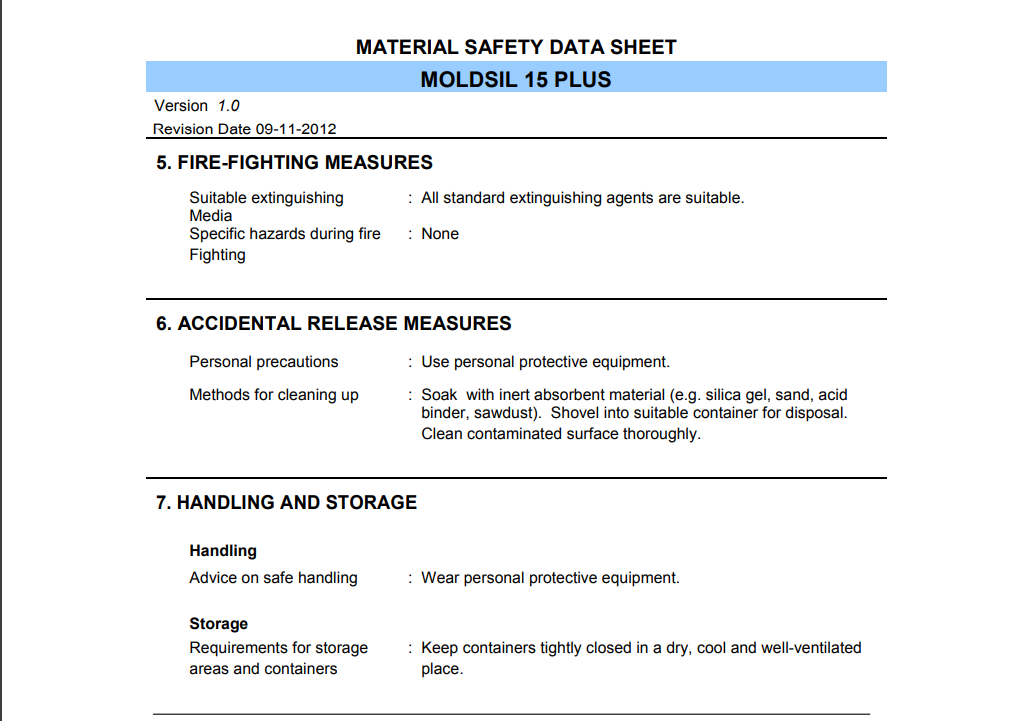
Moldsil
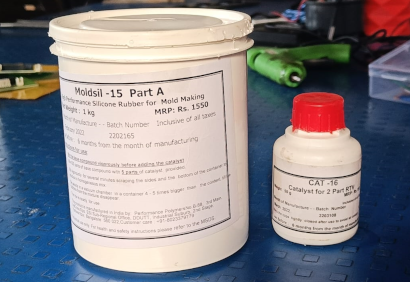
the another material for making mold is moldsil. This is silicon rubber which is used in mold making. This material come in two parts.
The bigger bottle contain high performace silicon rubber and another small bottle is act like catalyst for that.
We have to mix them in 100:5 ratio by weight or volume.
Safety
This material can cause skin irritation while come in contact with eye and skin. So be careful at the time use. it also flamable so dothe mixing properly.
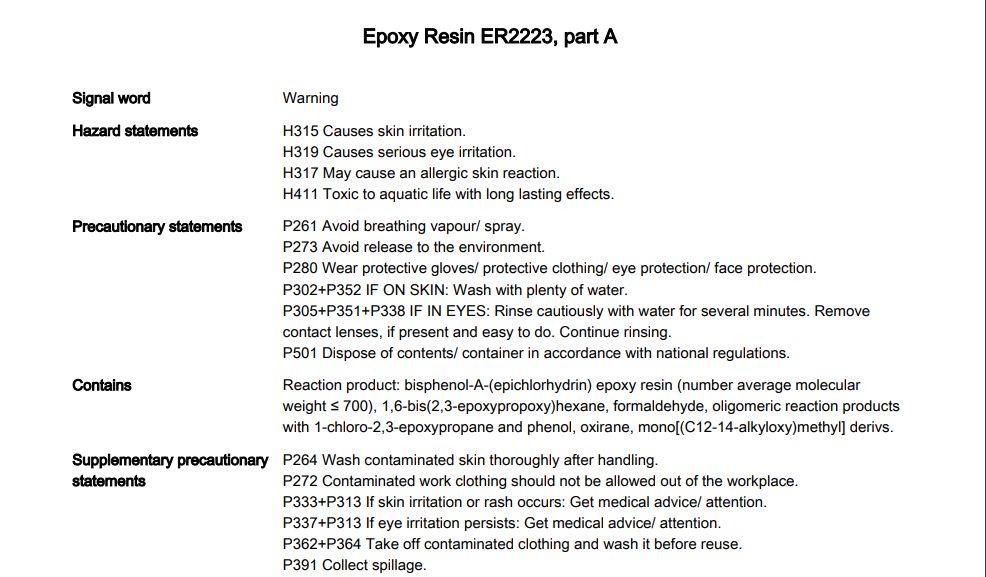
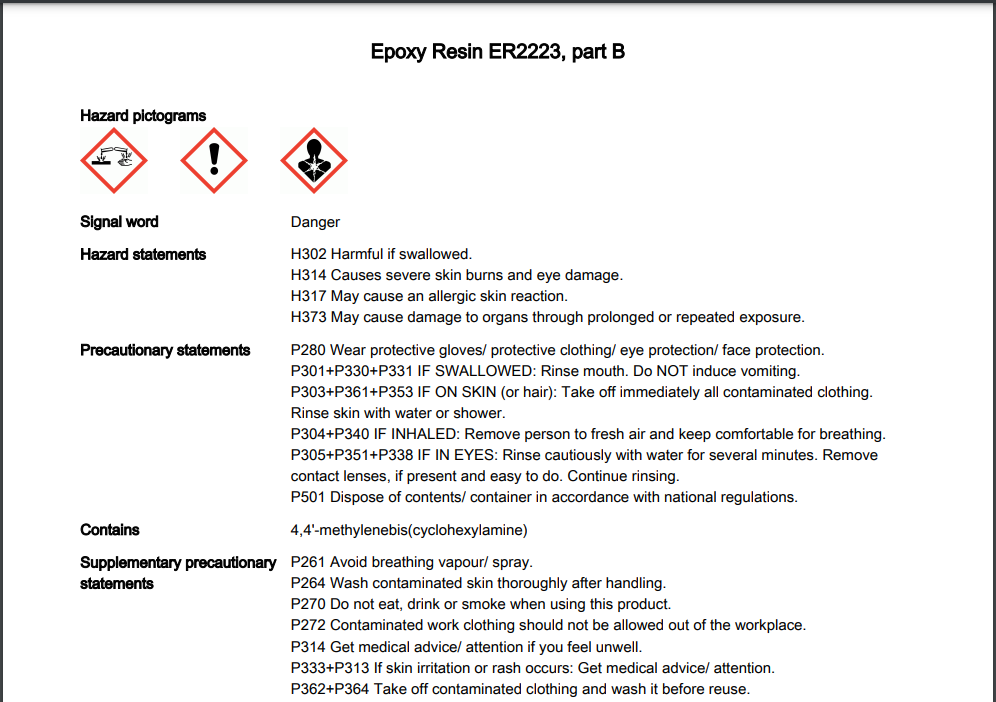
Epoxy resin
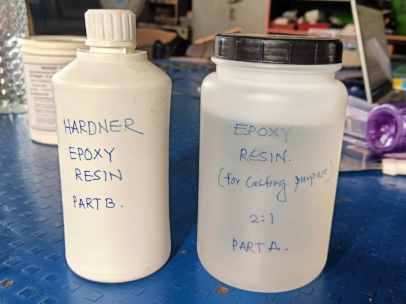
Epoxy resins is the material used for the casting purpose. It contain two material in it one is eppoxy which is belongs to class of synthetic
thermosetting polymer and resin is belongs to the class of organic polymer. They are mixed together and then we have to add hardner in it
to make the solution for casting purpose. We have to add epoxy resin and hardner in the 2:1 ratio. It take the cure time of 24 Hrs. after the
proper cure it become transparent solid structure. it doen not prevevt the UV rays.
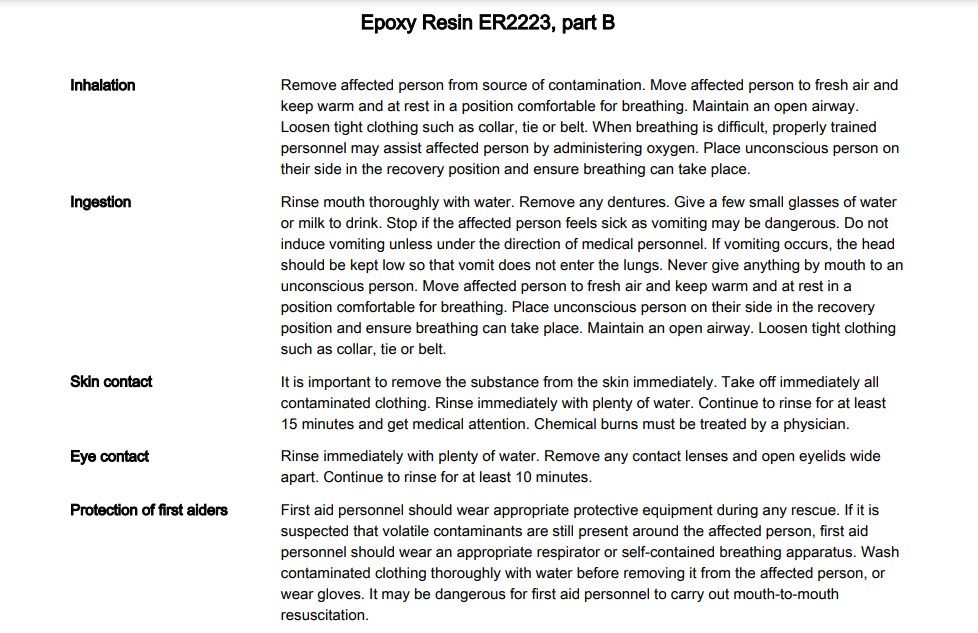
Safety
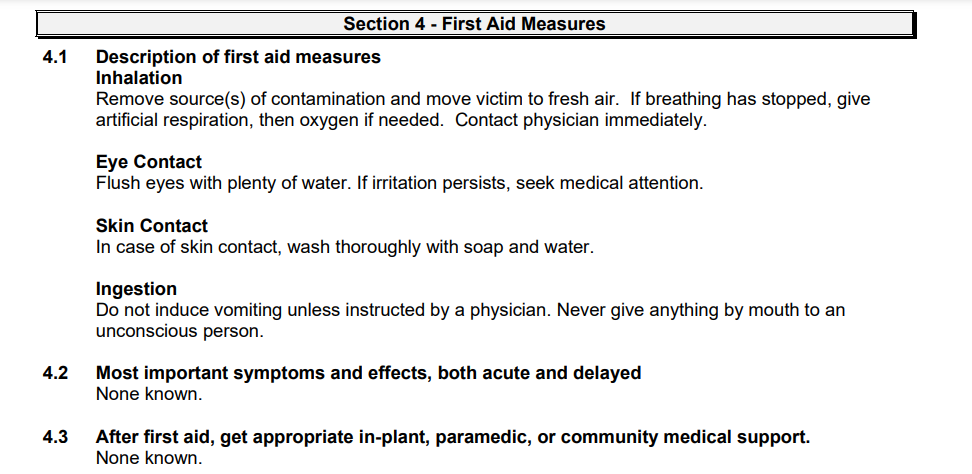
It can irritate skin and eye when come in contact so immigiately remove it from skinn if come in contact. It also harmfull for enviromentso dont dispatch it in enviroment. it is not flamable and does not causes any effect if we inhale it.
Testing
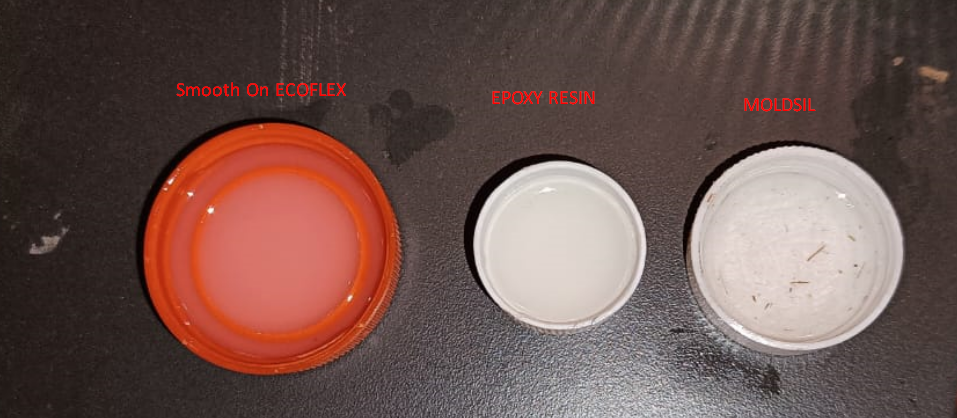
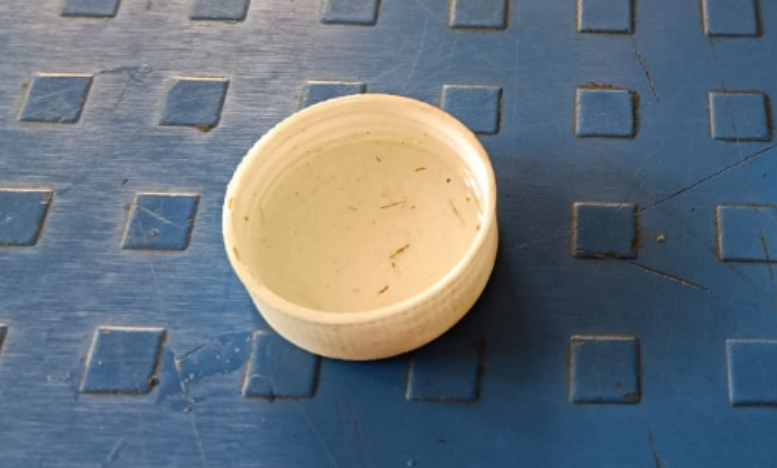
Now we mix the material in proper Ration and check their curing time. So we take three matrial smmothon ecoflex , Epoxy resin, moldsilwe mix them and pour it in bottle cap.
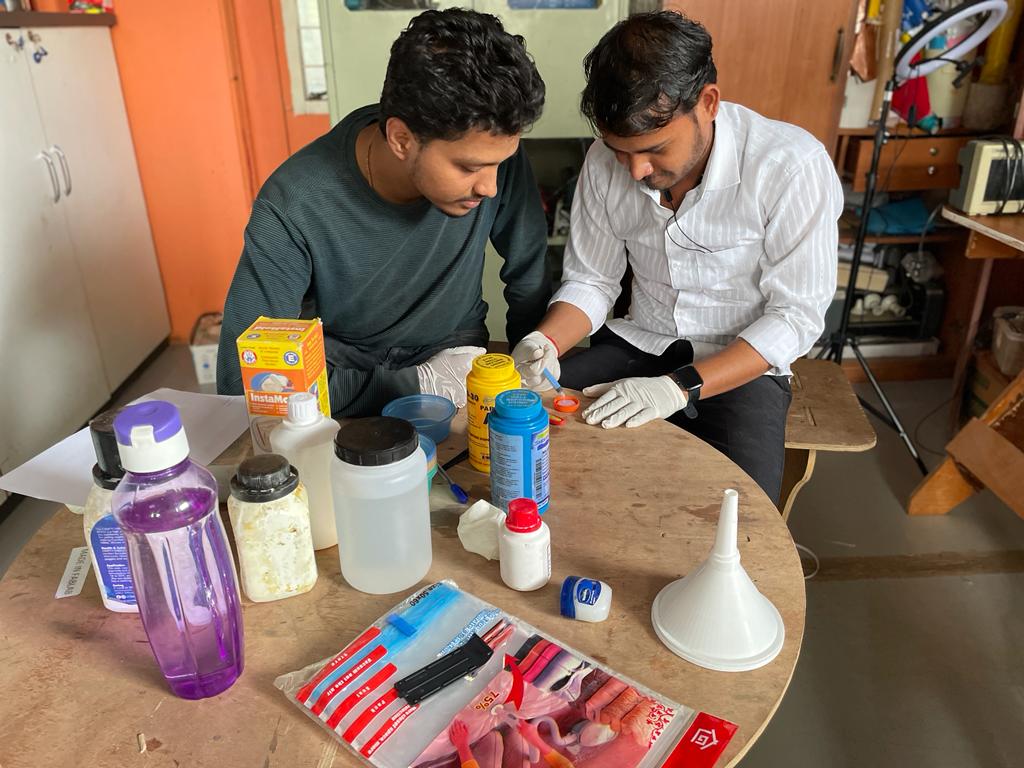
Result
Smoothon Ecoflex
After 4 Hour we see that the smoothon ecoflex is ready and taking pour time around 4 hour at normal room temperature.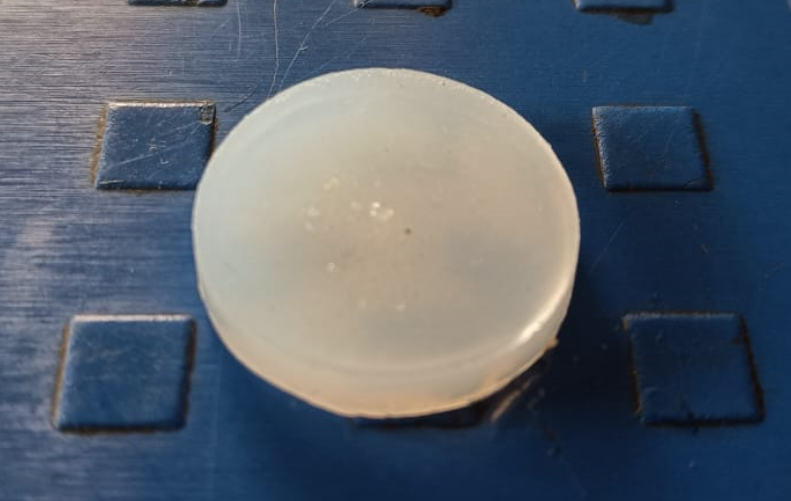
Moldsil
Mold sil also take 24 hour to proper cure at normal room temperature.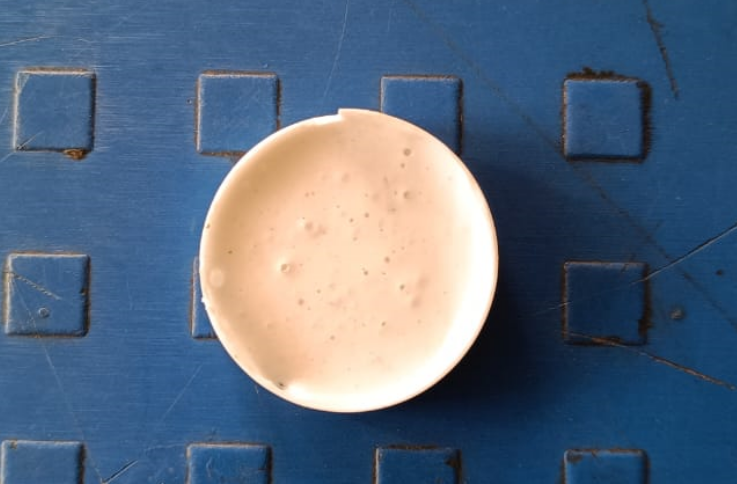
Then we check epoxy resin. It take almost 24 hour to proper cure. After that we cant remove from bottle cap because it trapped in thread of cap.
Epoxy Resin
Click here to know more about group Assignment.
Download the Safety data Sheets
Download FileIndividual Assignment
Design
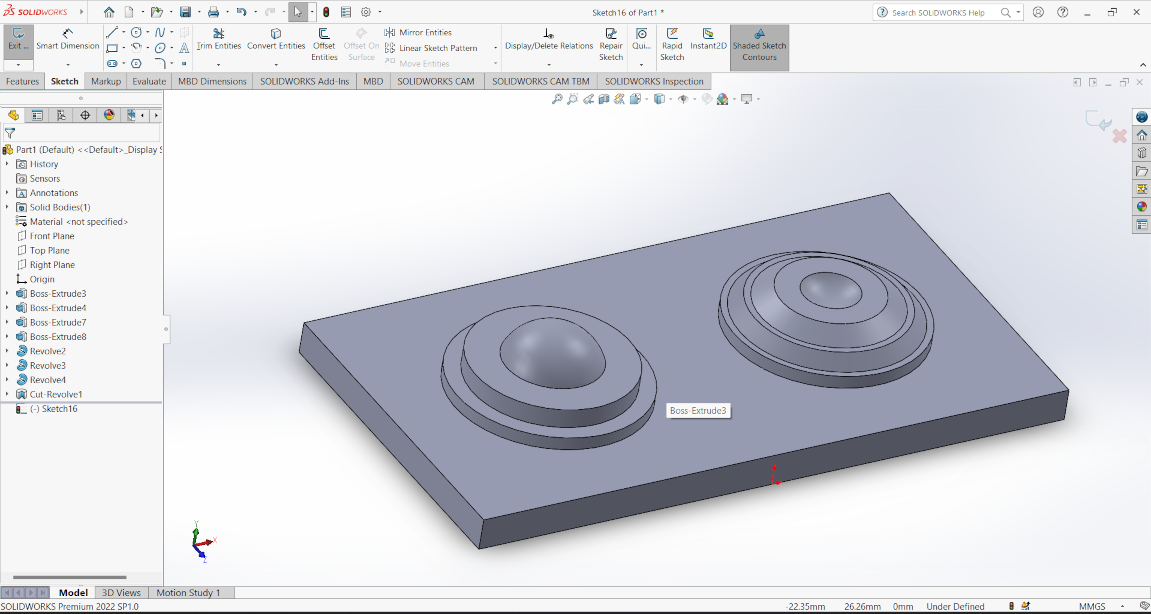
Now I have to design a some thing for the making the positive mold. For the design I chose The Solidworks software. So I decided to Design a space ship.Firstly I design it fully and then I am go for Mold making process.
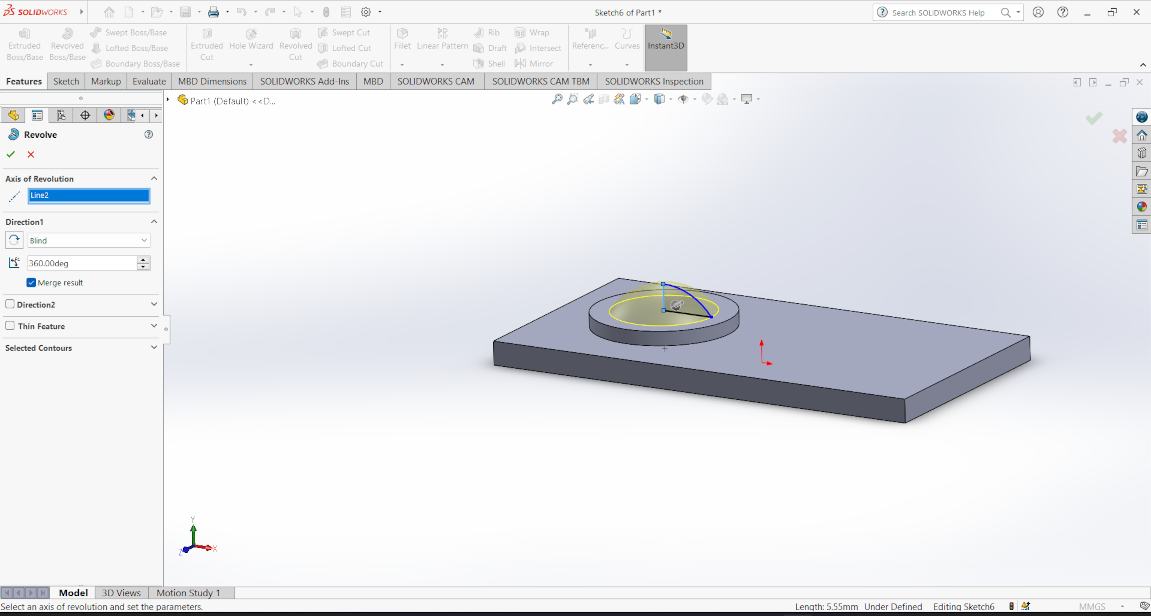
I make rectangular box of 95*50mm and extrude it about 5mm and then I make a circle and again extrude it. Then I want to make a less than half sphere on
the Extruded cicle and then I revolve it.
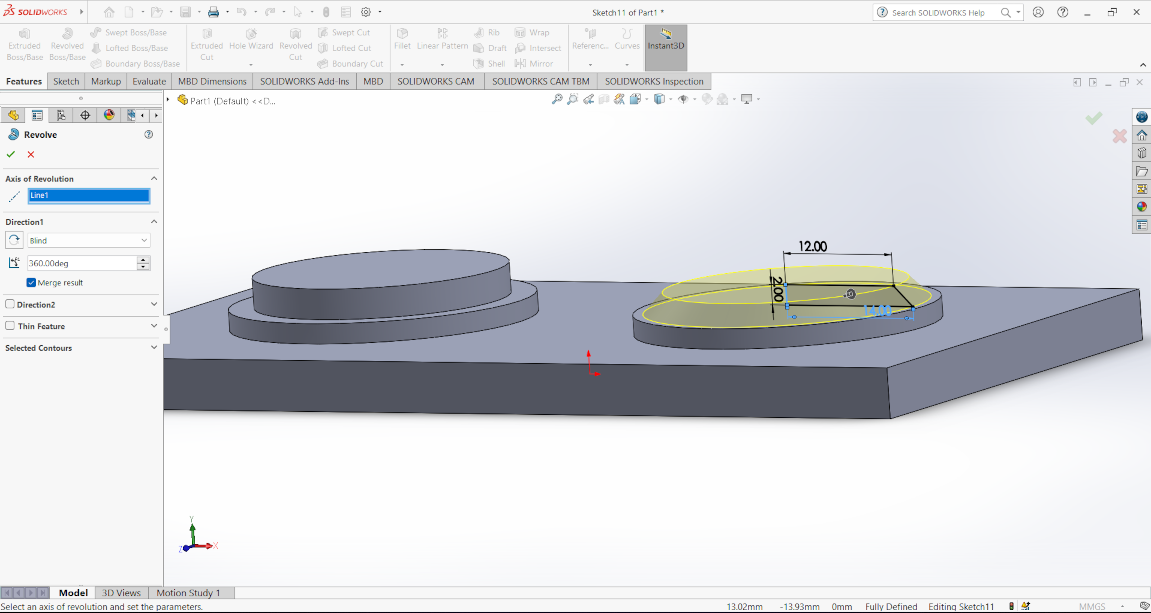
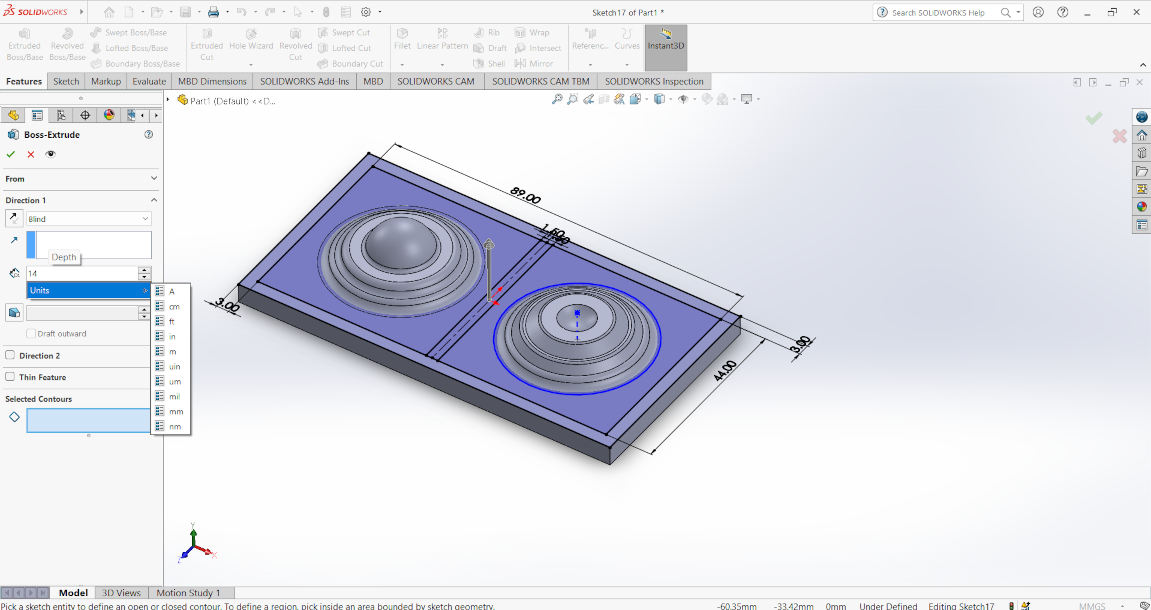
Now I change design I remove the spehere part and add another corcle and extrude it. Then In another half I sketch a cicle and extrude it. Then I make a
trapezoidal shape and then revole it .
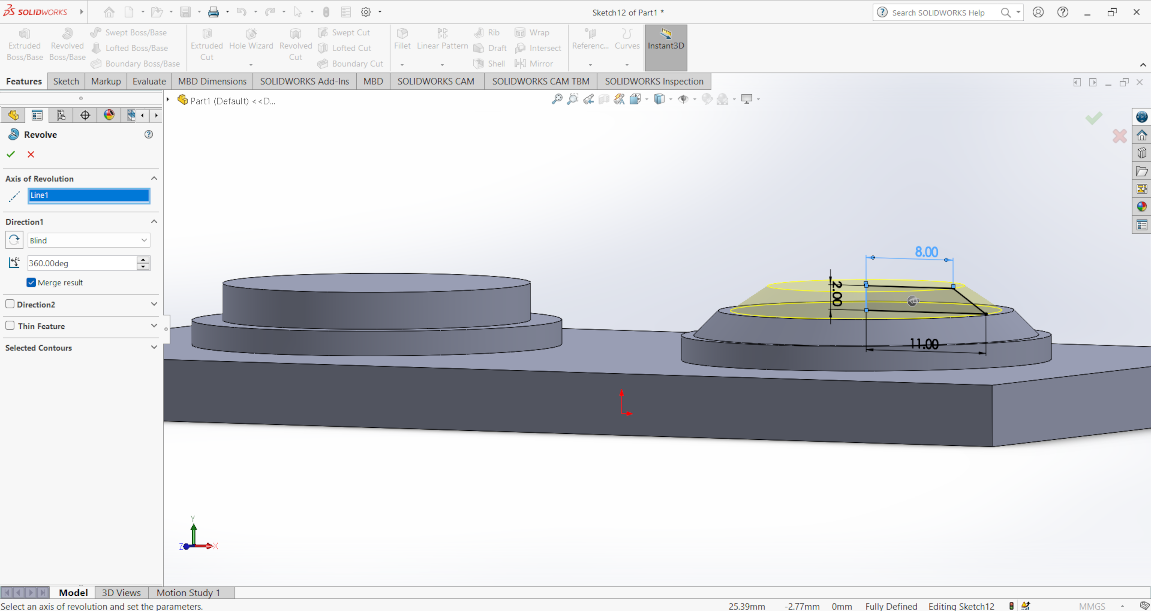
Now The design is ready. We have to give it to boundry and interlocking system by which our mold get fixed easily.
So I make a boundry layer of 3mm and then extrude it. After that I take two refrence pane and then make a interlocking mechanism
At this Time I also add Inlet section by which casting material get enter in mold and it also have a outlet section by which trapped
go outside through it.
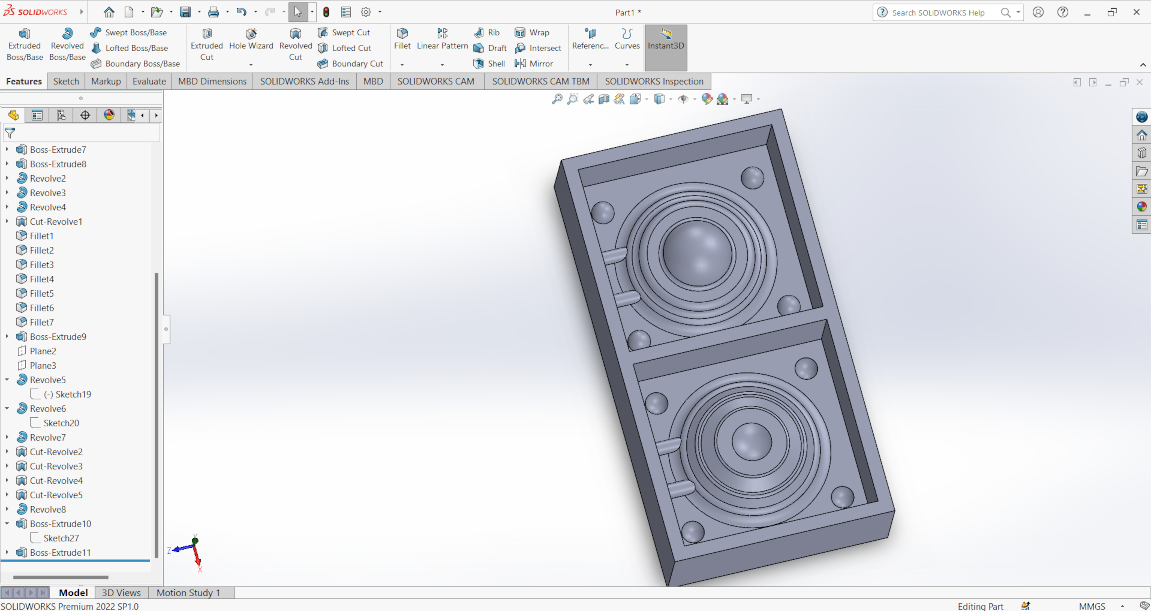
After the design complete save this file in STL formate.
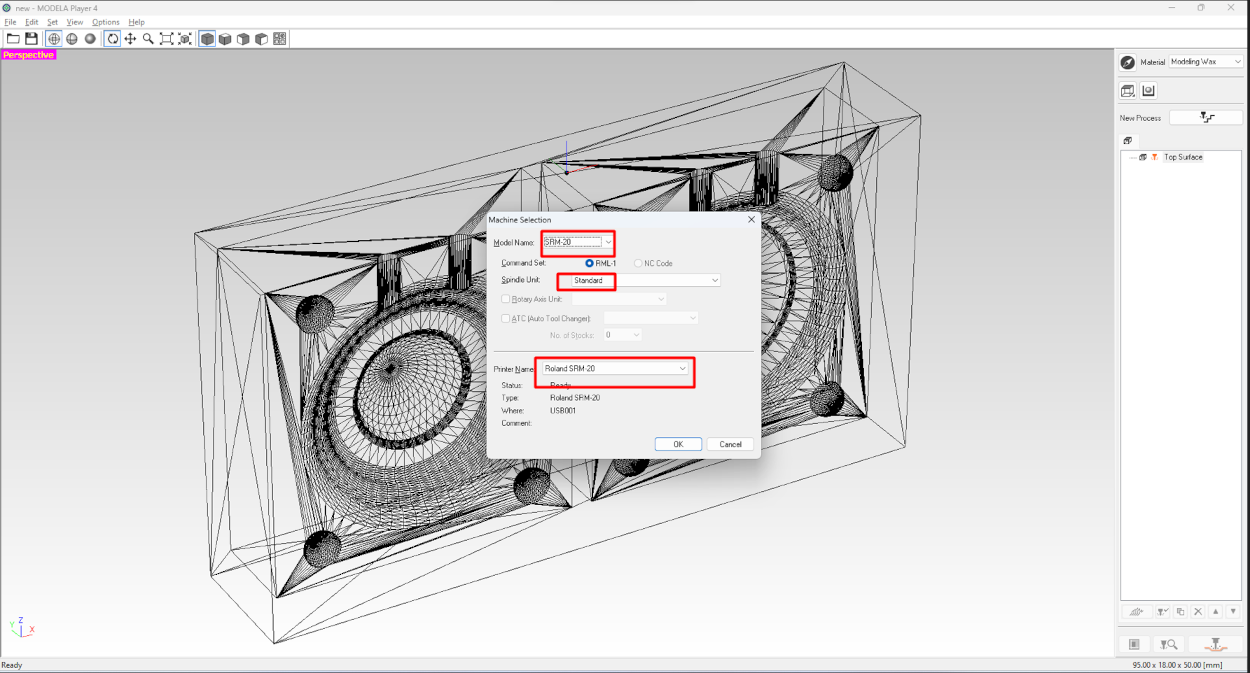
Tool path Generating
After making the design we have to create a toolpath for the design. For creating Tool path I am using modela player 4. So firstly open the your designed STL fileGo to the " File >> select Machine " after that a popup window occure Where we have to select Our machine model name, command set, etc. I am selecting SRM20 machine for
the mold making process

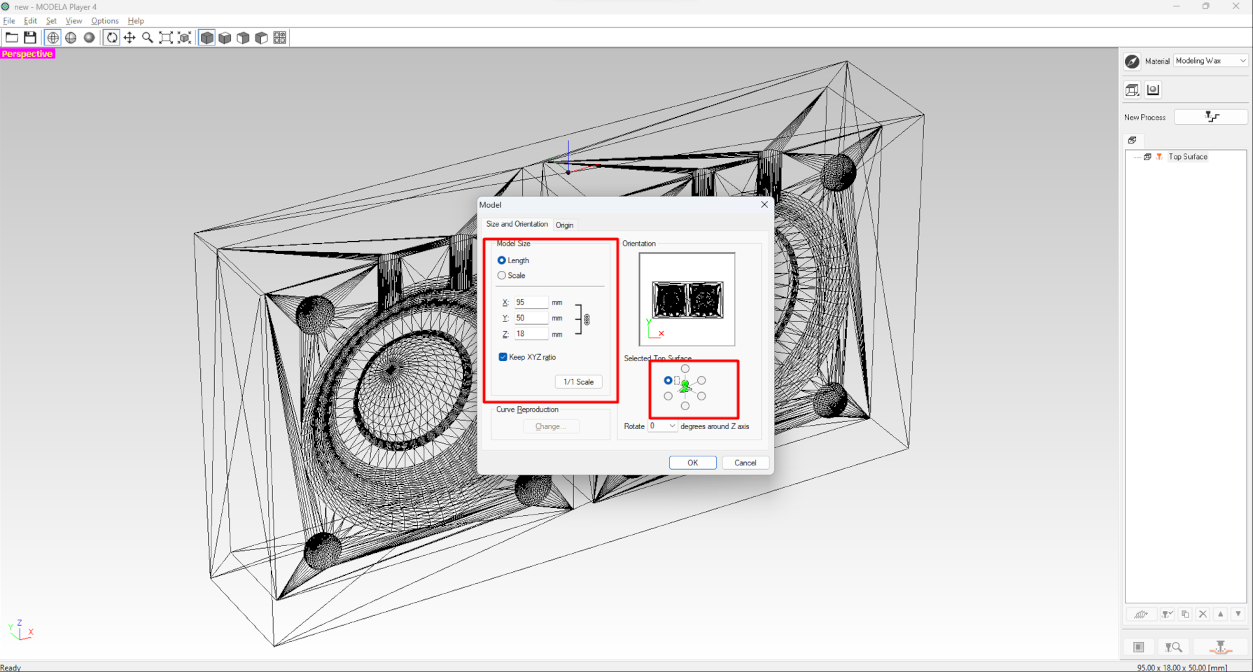
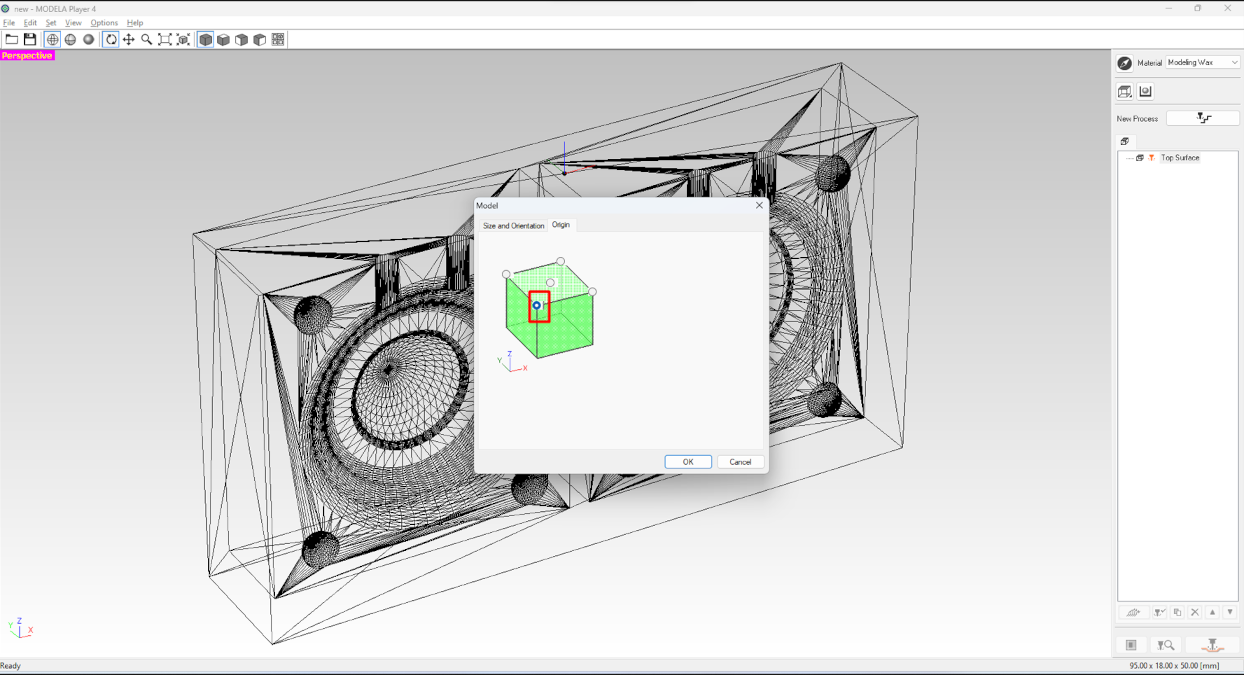
After that go to " SET >> Model >> Size and Orientation " here we have model size option which I does not changes this parameter. then I select top surface according to my
design. Then I go to origin option and then select a origin point.
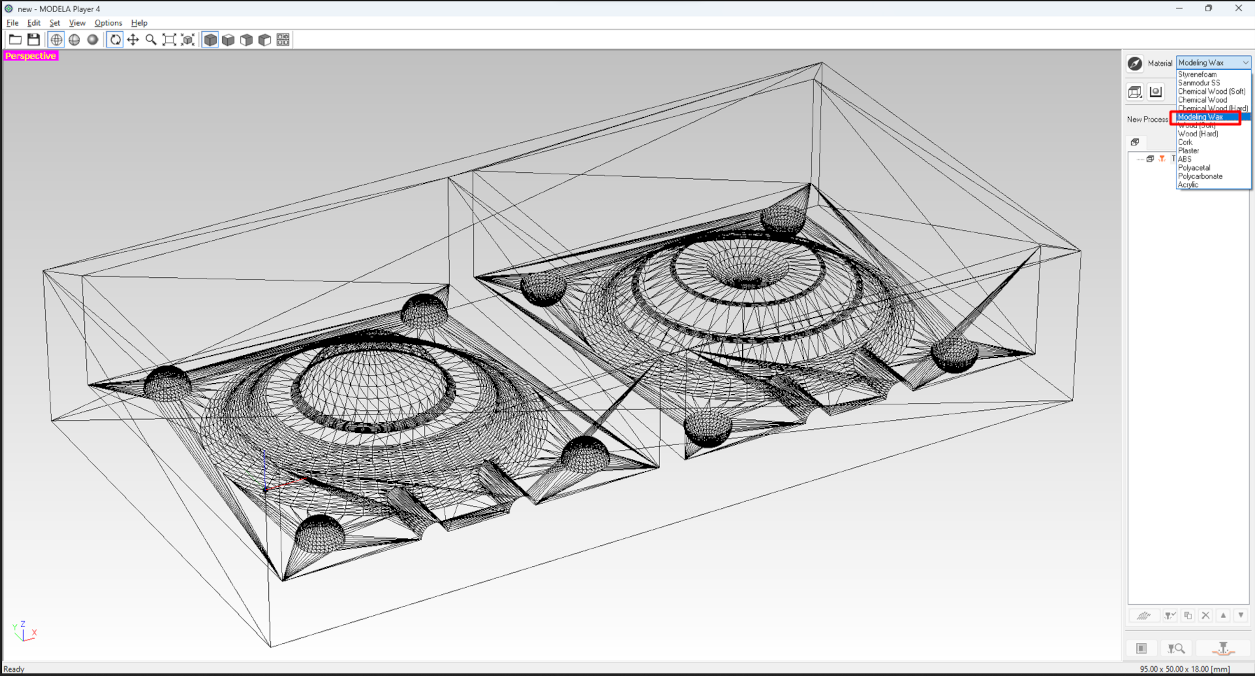
then select material . I am using a Machinable wax for this mold making process.
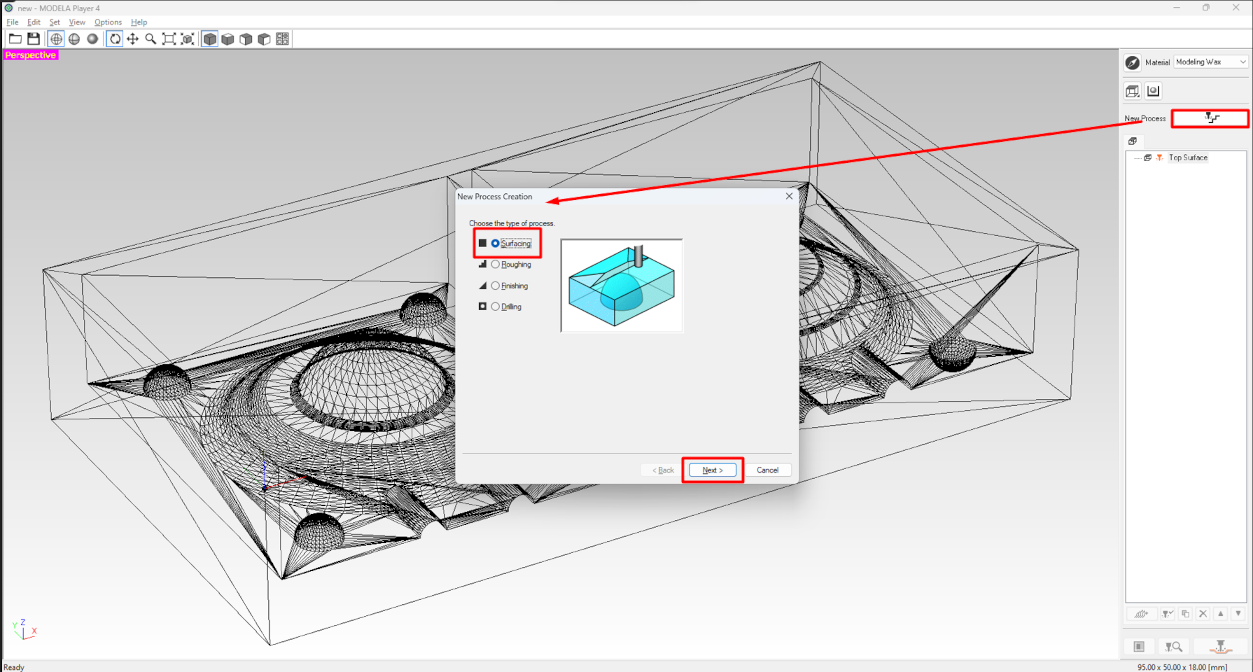
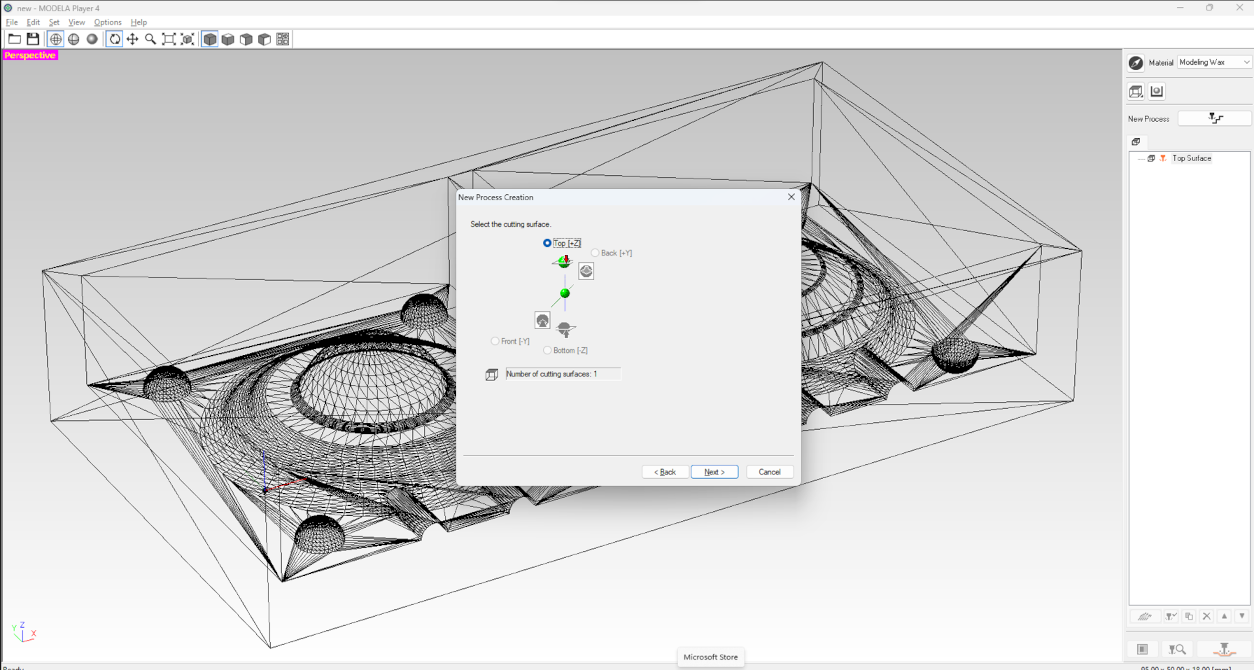
Now we have to make surface uniform so for this go to the "New Process" Then a new pop up window appear. In this we have to select surfacing and then next .
Then we have to select cutting surface side. It by default set on top z+. I am not making any changes here and then next.
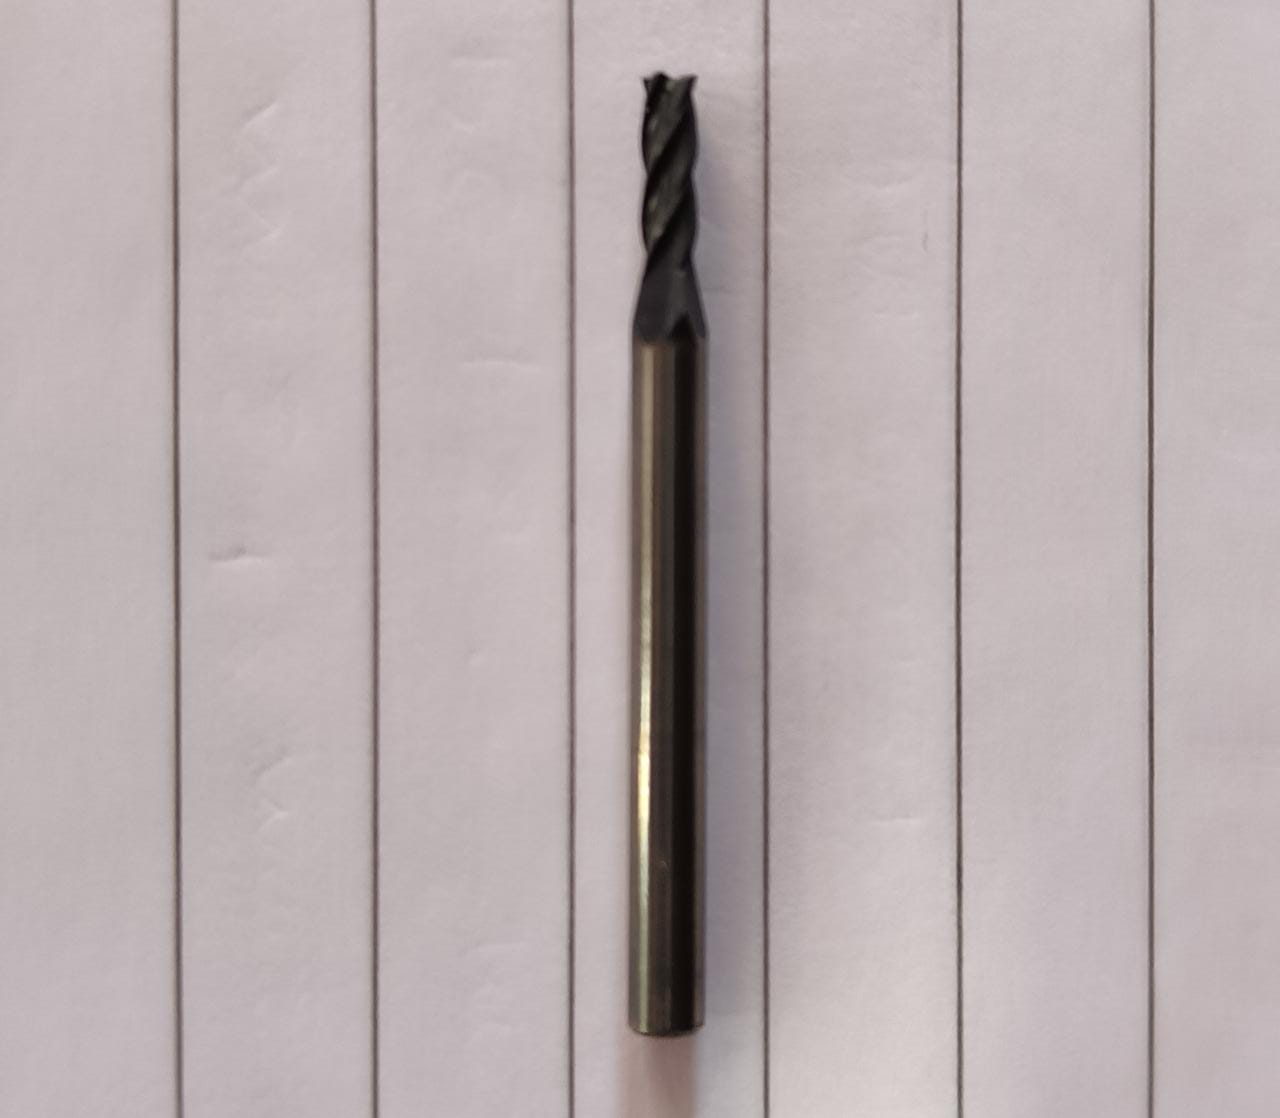
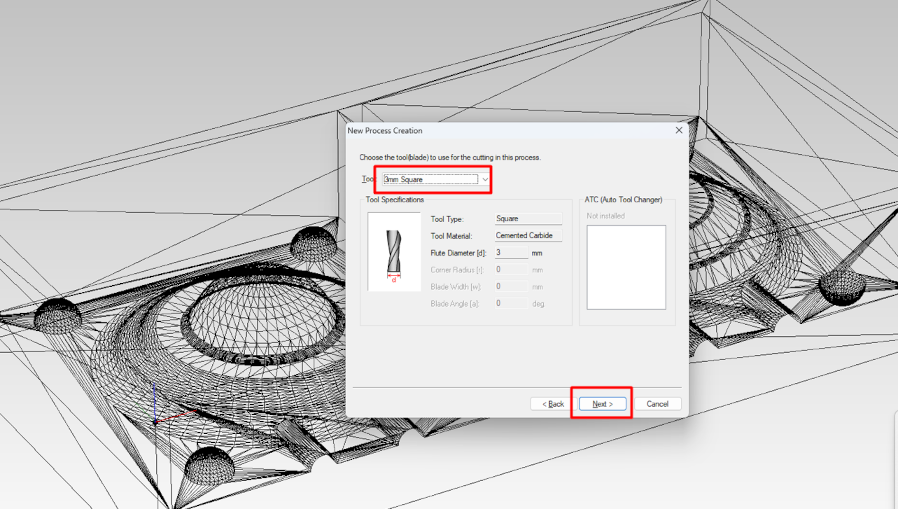
Then we have to select tool for the surfacing operation. I selct 3mm square tool for surfacing. The tool I used have four flute in it.
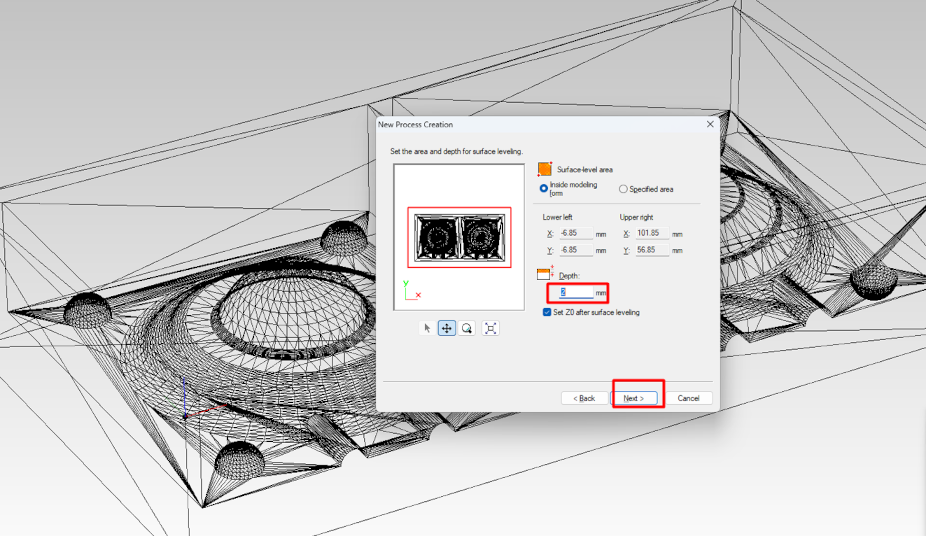
Then a surface level area option occure. I sselect depth size of 2mm for the surafacing and go for next slide
Now we have to select scanning line pattern. So I select a bidirectinal line along x Axis and set the cutting start point set to lower left.
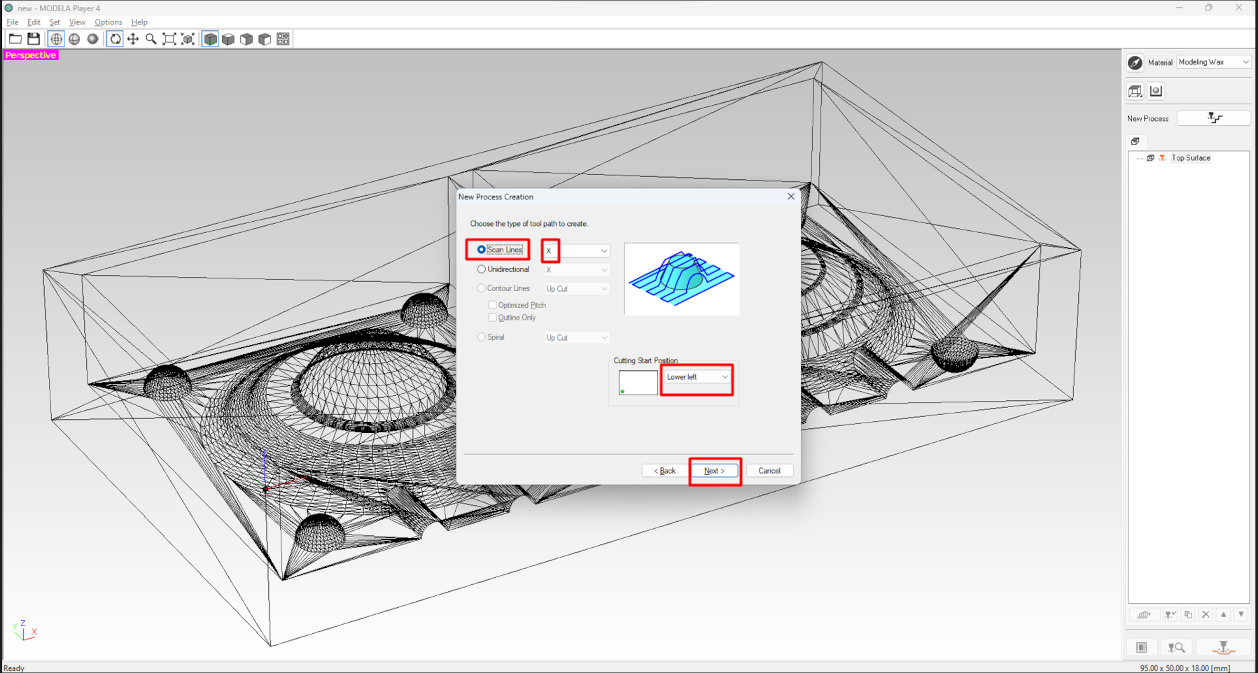
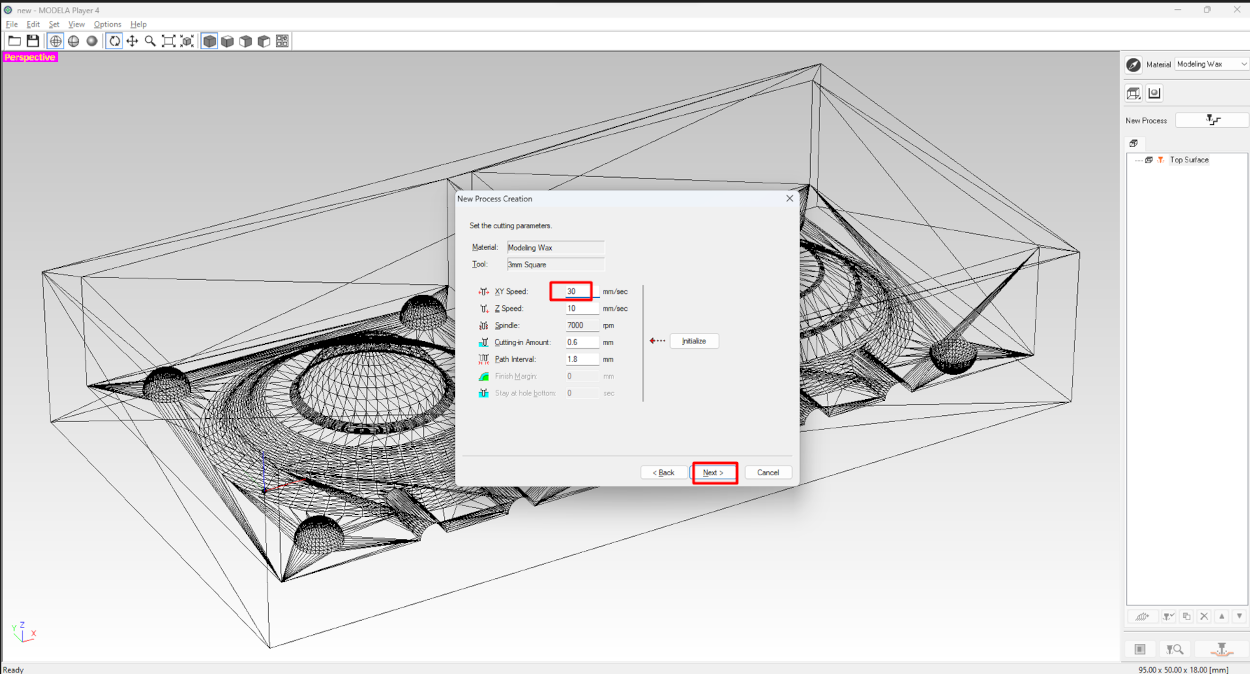
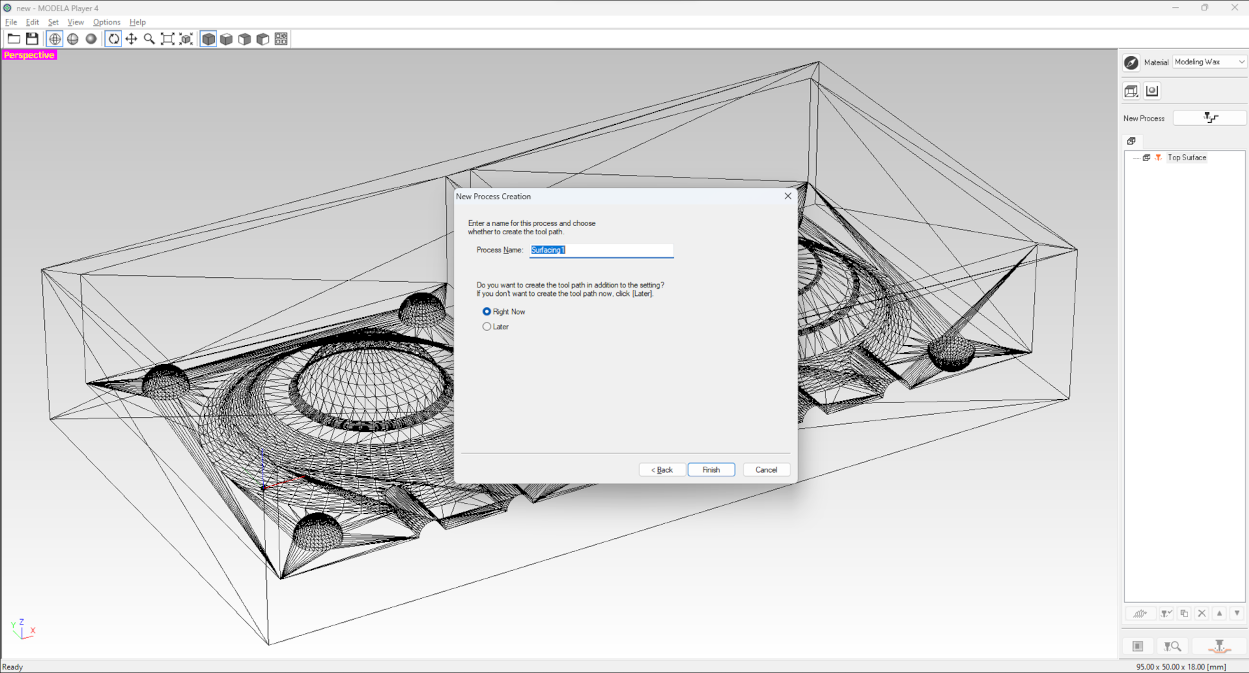
Then after next cutting parameter window appear where we can see that out tool selection , material selection. here I just incresed the XY speed by 30mm/sec and then go to next and
name the procss and select right now to create tool path
This is the process of generating tool path for surfacing.
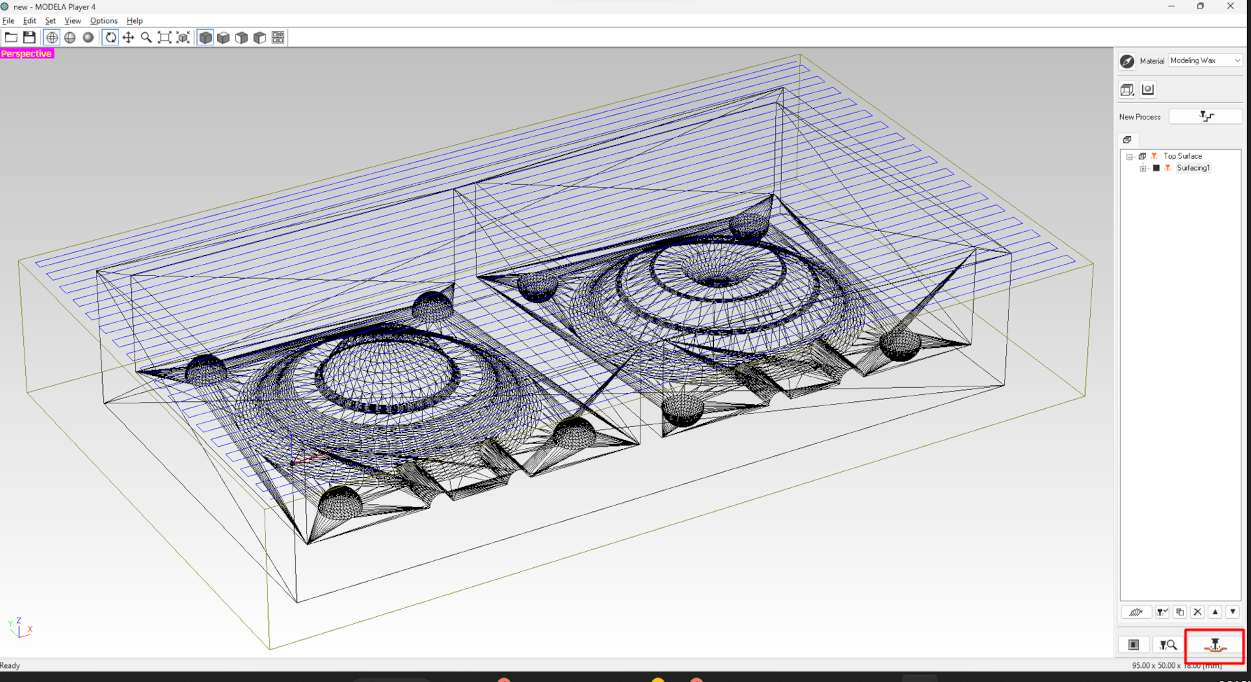
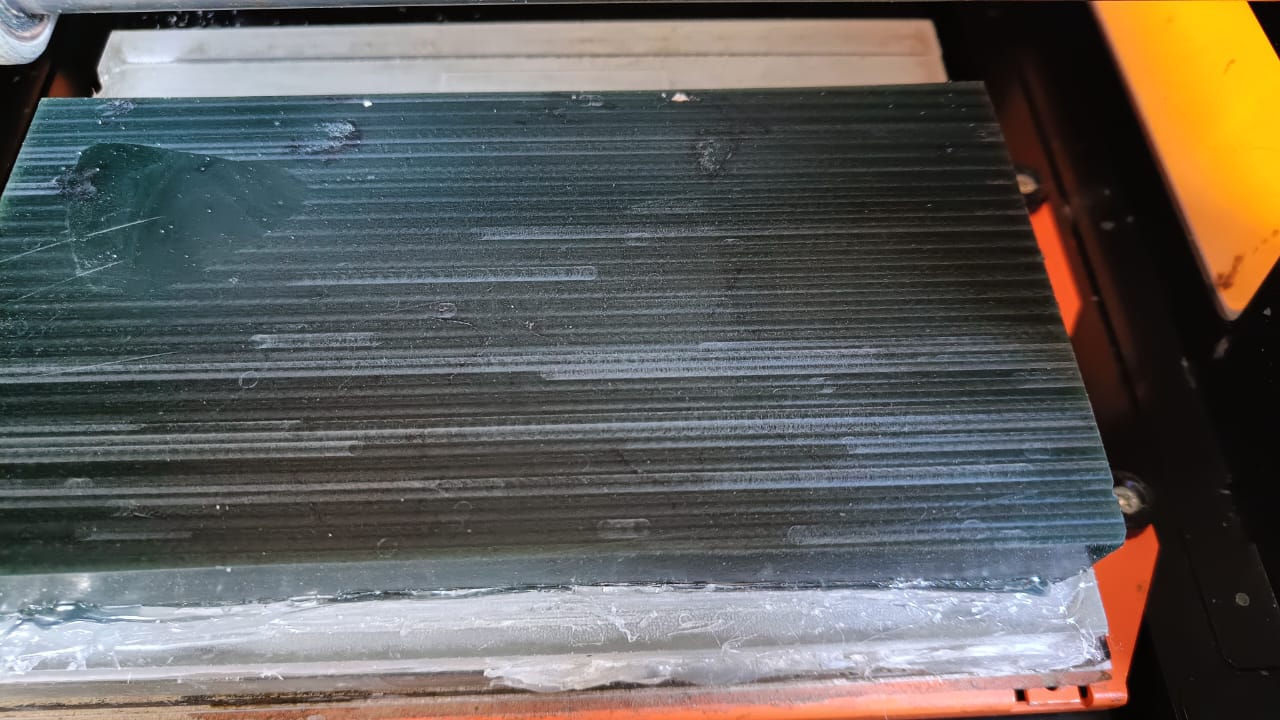
Now we have to attach a wax material to machine so I apply double sided tape on the wax and then paste them on the machine bed. After that I am stick them properly
with help of glue Gun. Now open the V panel and select a origin point then minimize the v panel window and open modela player 4. then go to cut option.
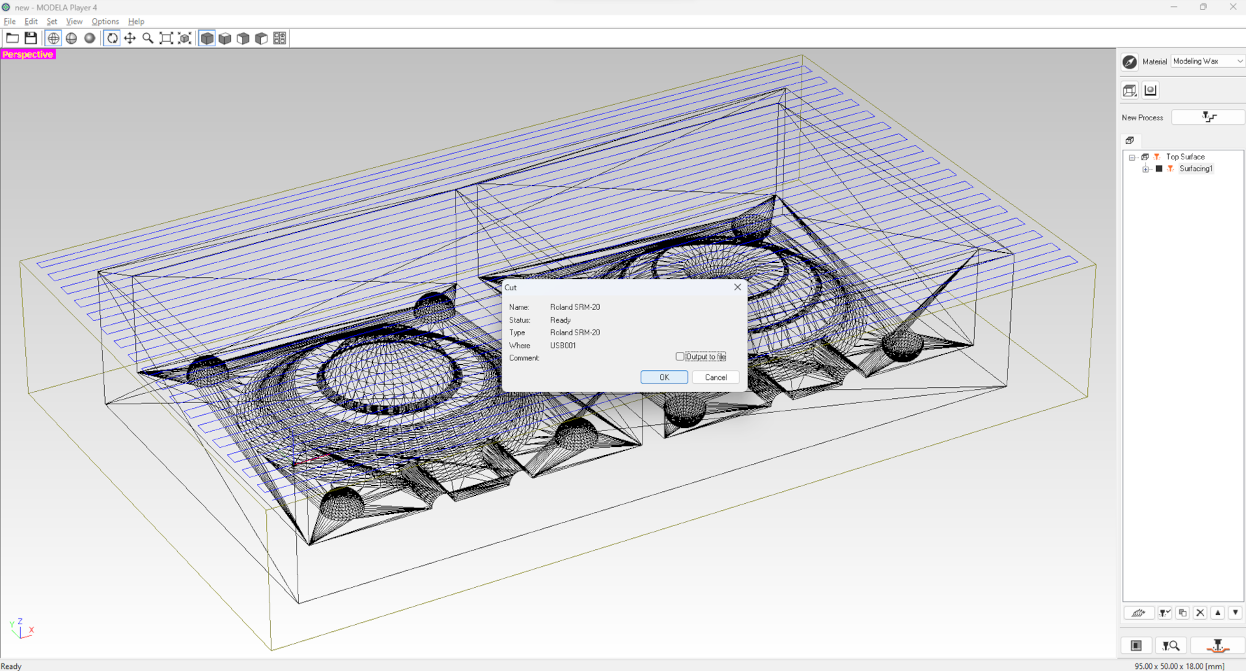
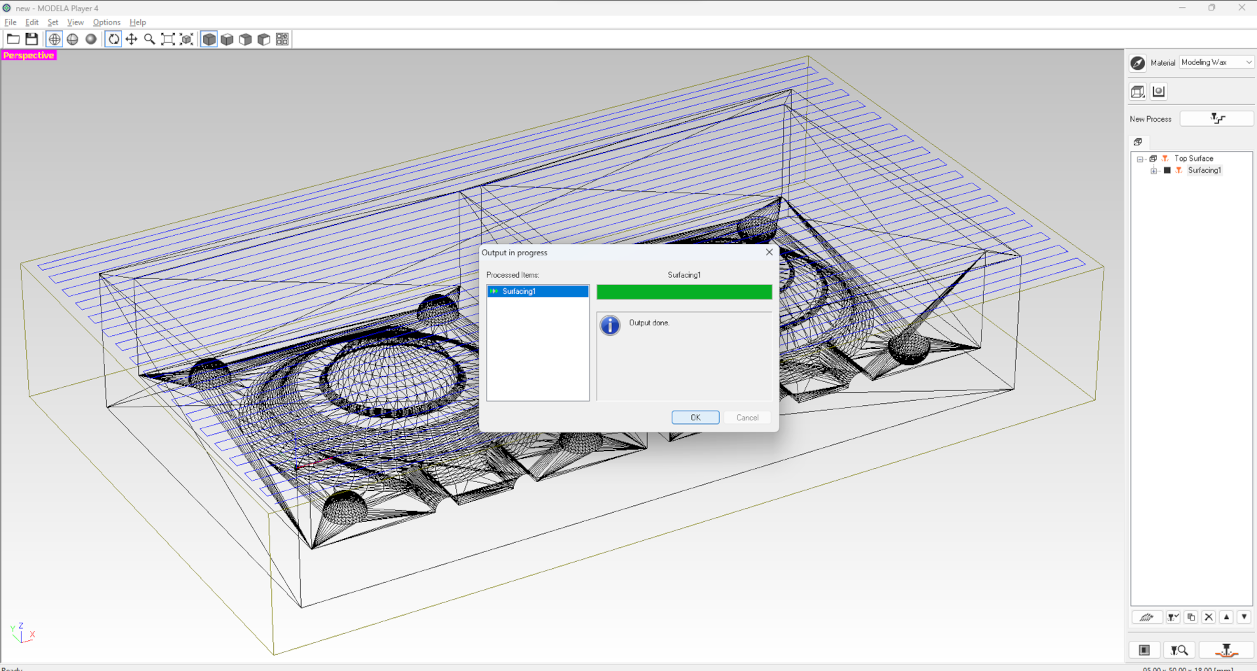
Then our surfacing process started. We alredy do this process according to wax block size.
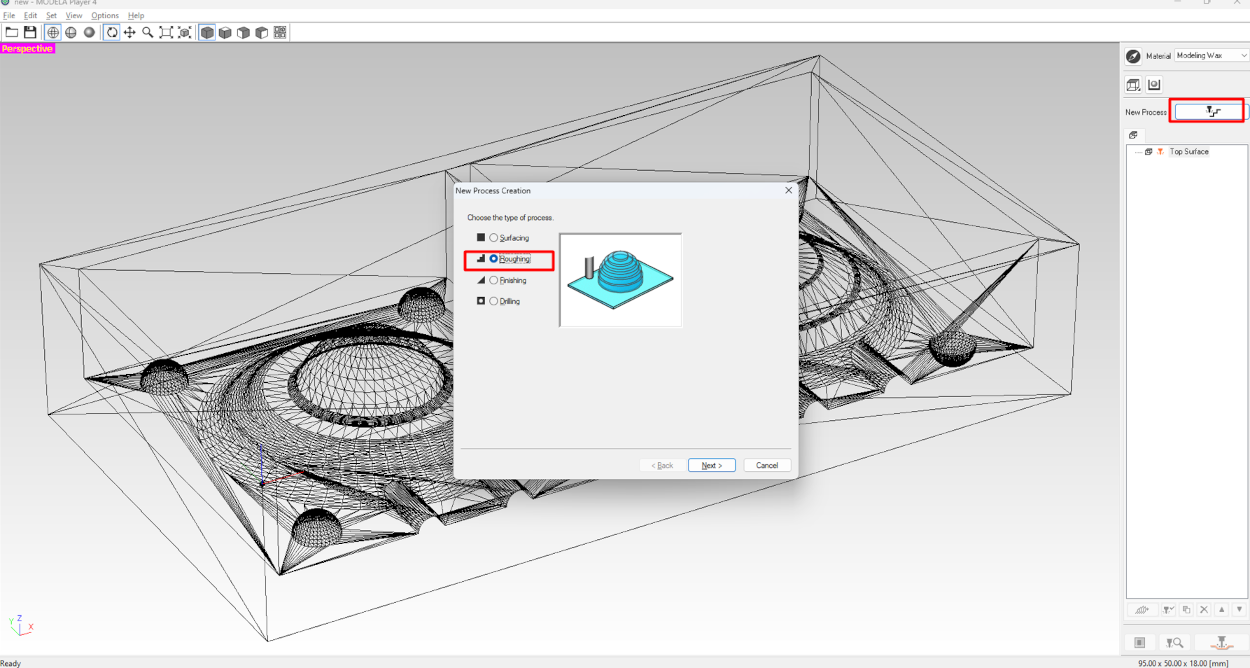
Now again go the new process option and select Roughing option and then next cutting surface set to the Z+ top. Then next select 3mm square tool for roughing and then next.
Now we have set the cutting area and depth. The red square point in the design indicate the two corner and the right side we have of lowe left and upper right. To enable this option
select partial and set lower left x and y to zero and for upper right select x and y dimension according to our design. My design size is 95*50 mm so I am going to set X as 95 and Y as 50.

and then follow the same process as we follow in surafcing.
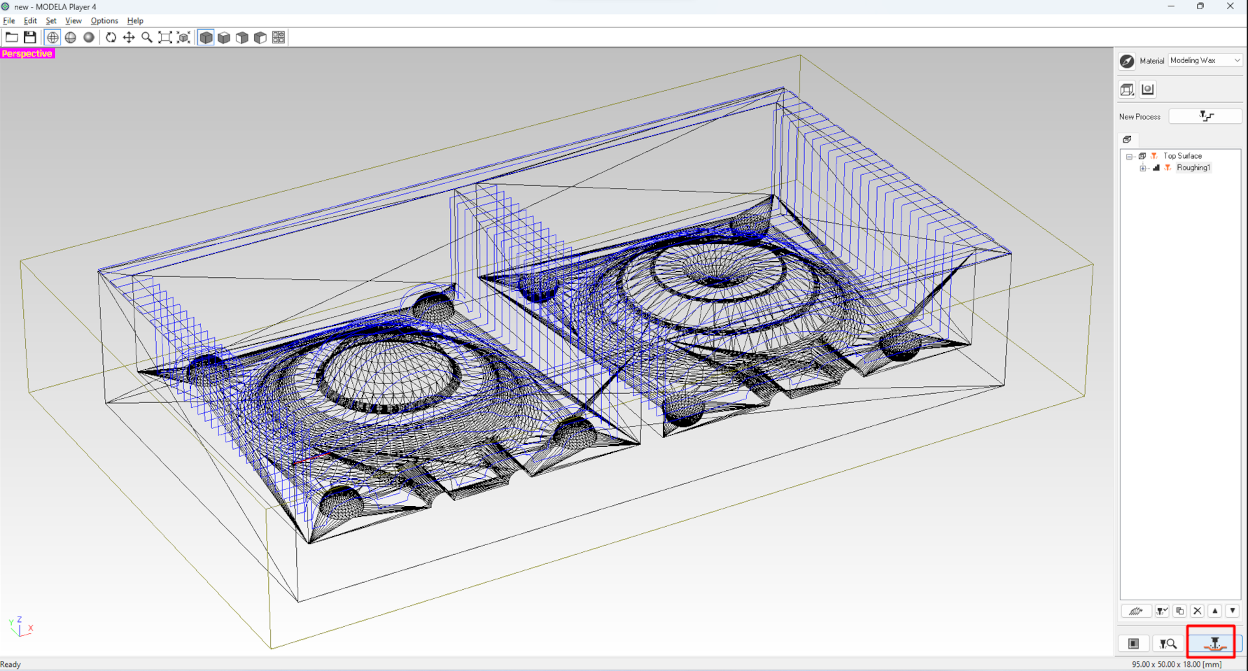
after the roughing the Design look like that. It have steps in the design which can me remove ni finishing process
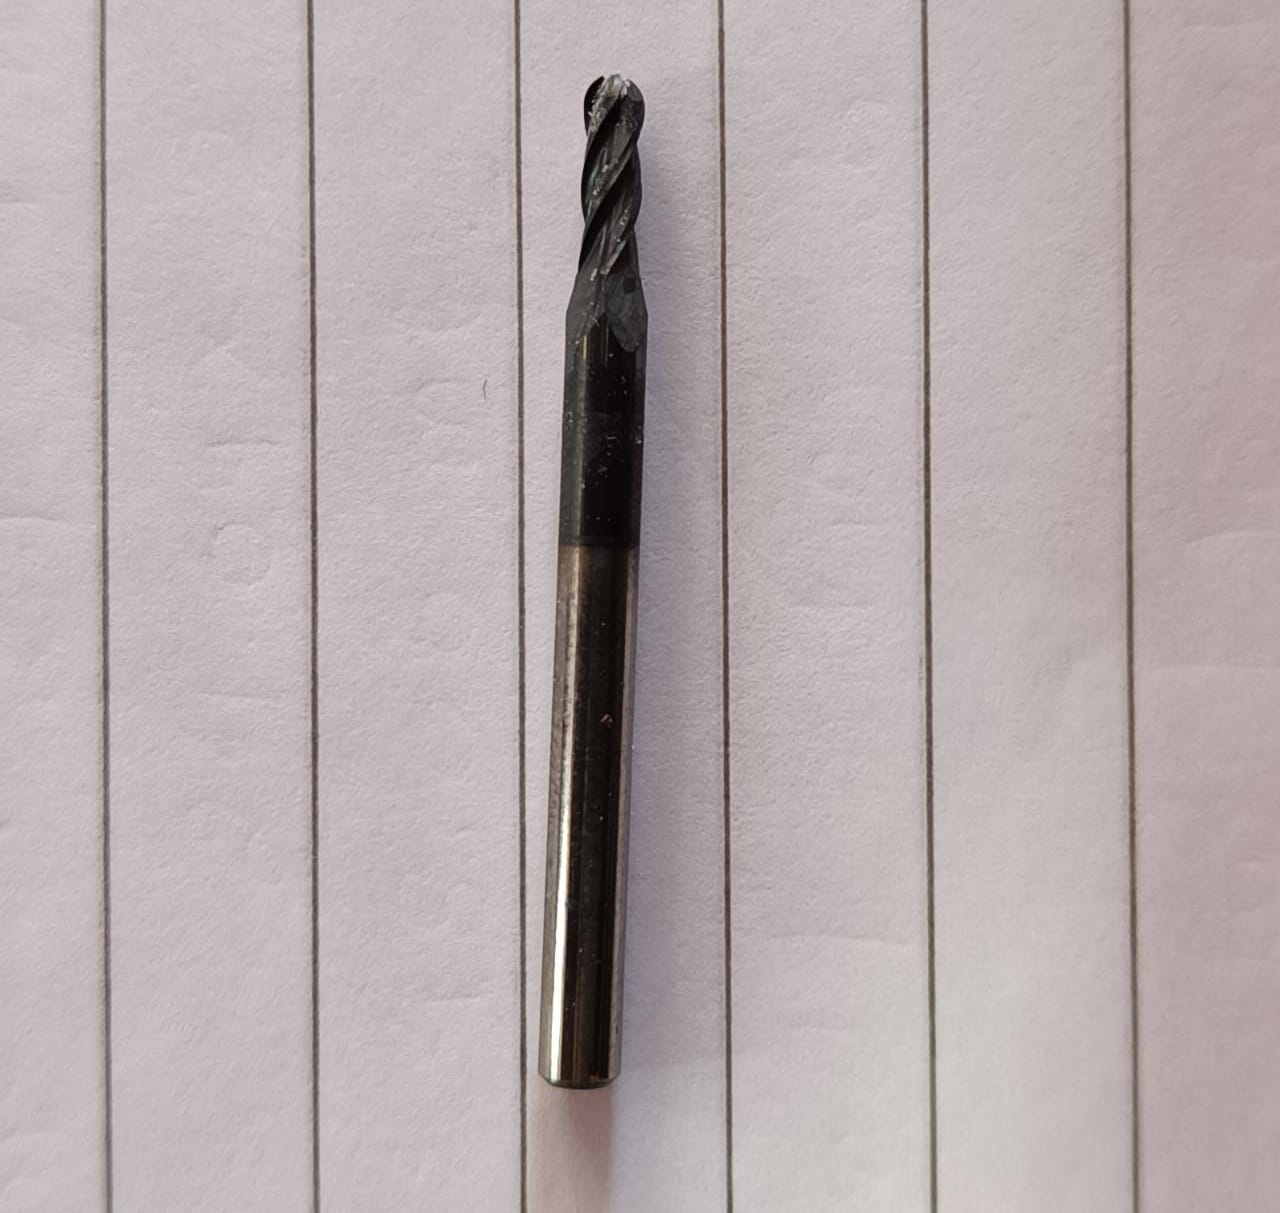
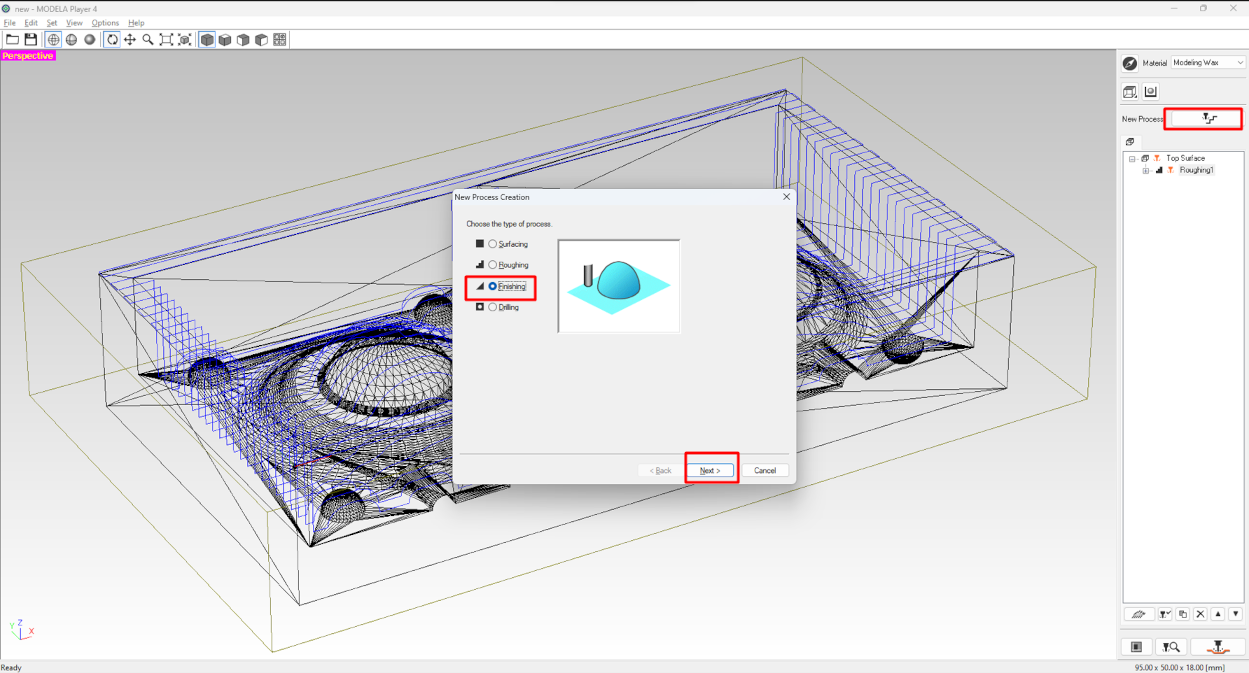
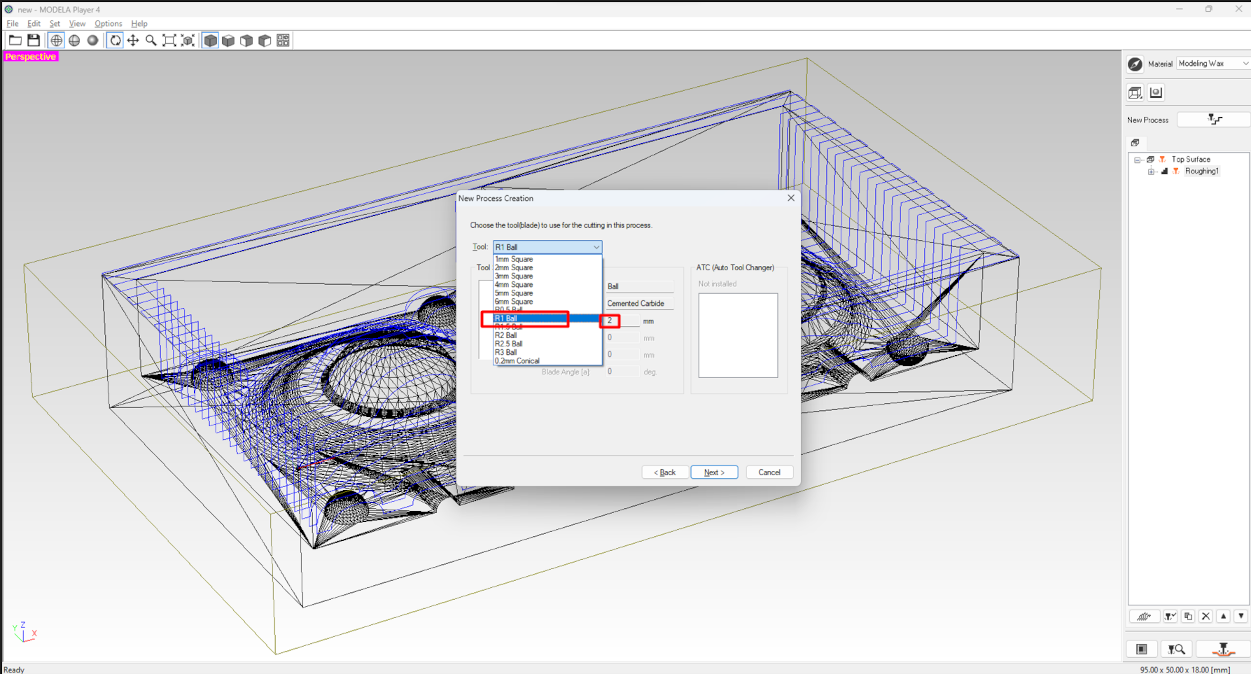
Now after roughing we have to generate toolpath for the Finishing process. Now go to the new process select finishing. I am selecting 2 mm diameter ball point tool for finishing.
It also have four flute and mainly used for the finishing process.
follow the same process as we follow in roughing process.
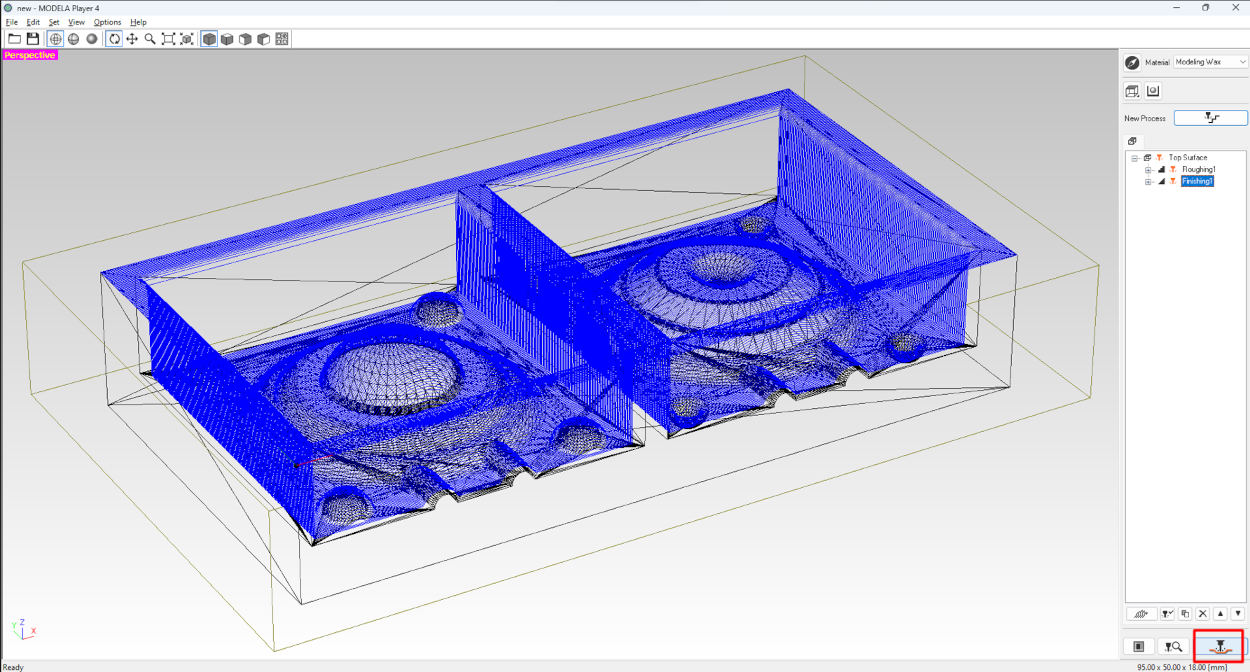
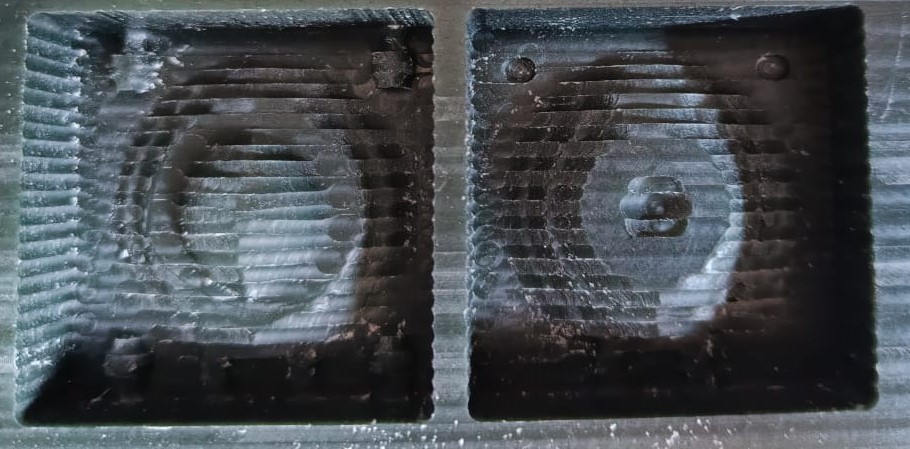
After the finishing process our wax material is ready to making mold
mold making process
For mold making I am using moldsil silicon rubber. Now I have to measure the volume for the material required for mold making. So I take a 50 ml water in measuring flask andput the water inside the wax. After filling of water only 8ml water left in my flask. so the total 42 ml of material required for the mold making.

Now I have to convert this volume(50 ml -I am taking extra volume ) into weight so I found that the density of silicon rubber lies between 1.10 to 1.50 g/cm^3. So I calculate the total
weight by applying formula. Then I calculate the required amount of both material A and B.
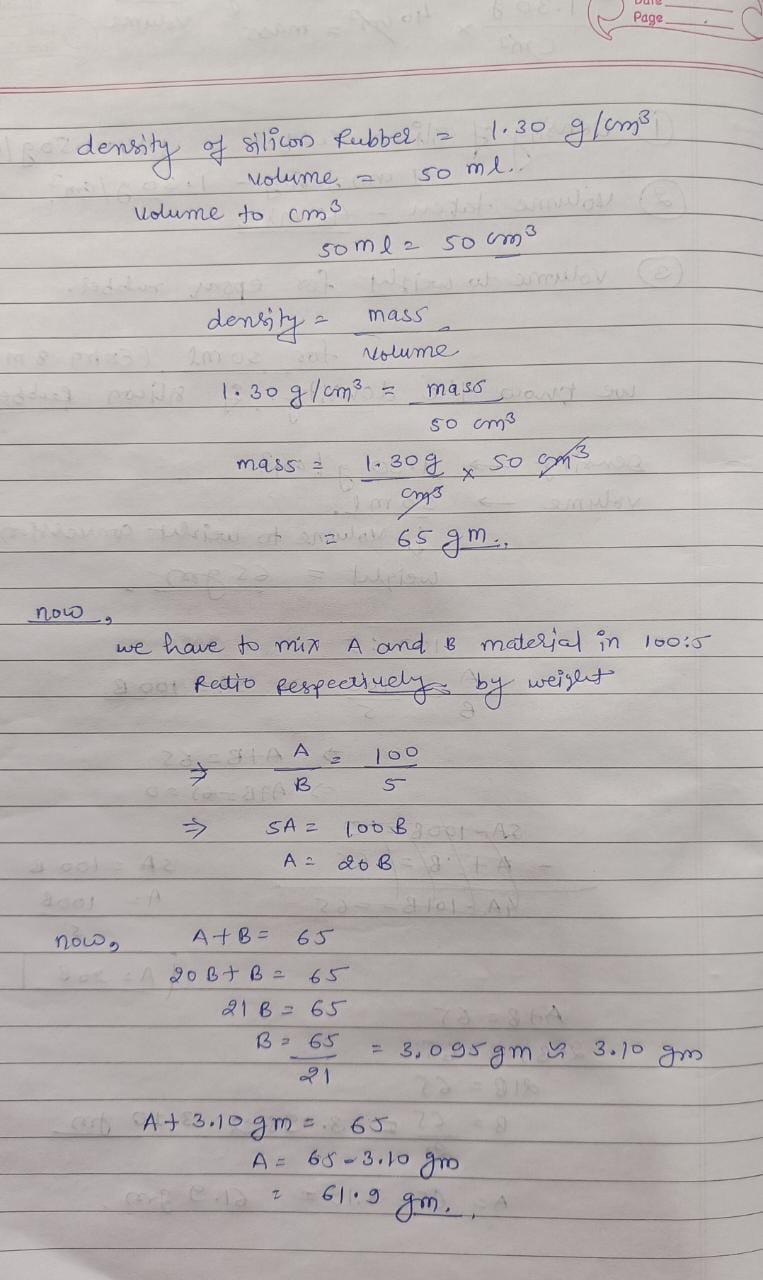
After the calculation I found that 65 gm of material is required. Now we know that we have to mix the both material in 100:1 ratio. So i again calculate the value by making
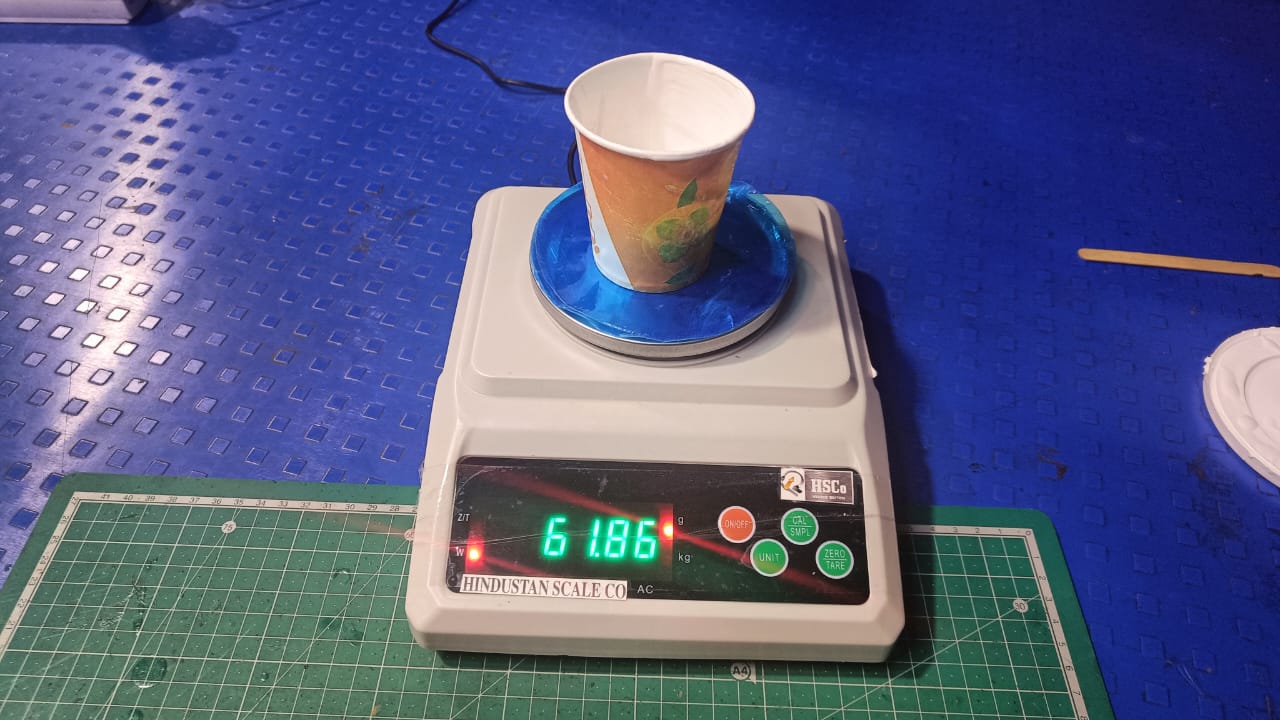
quadratic equation and find the value of A and B. The material A- silicon rubber is required 61.9 gm and catalyst(Material B) is required only 3.10gm. So I take weight machine than
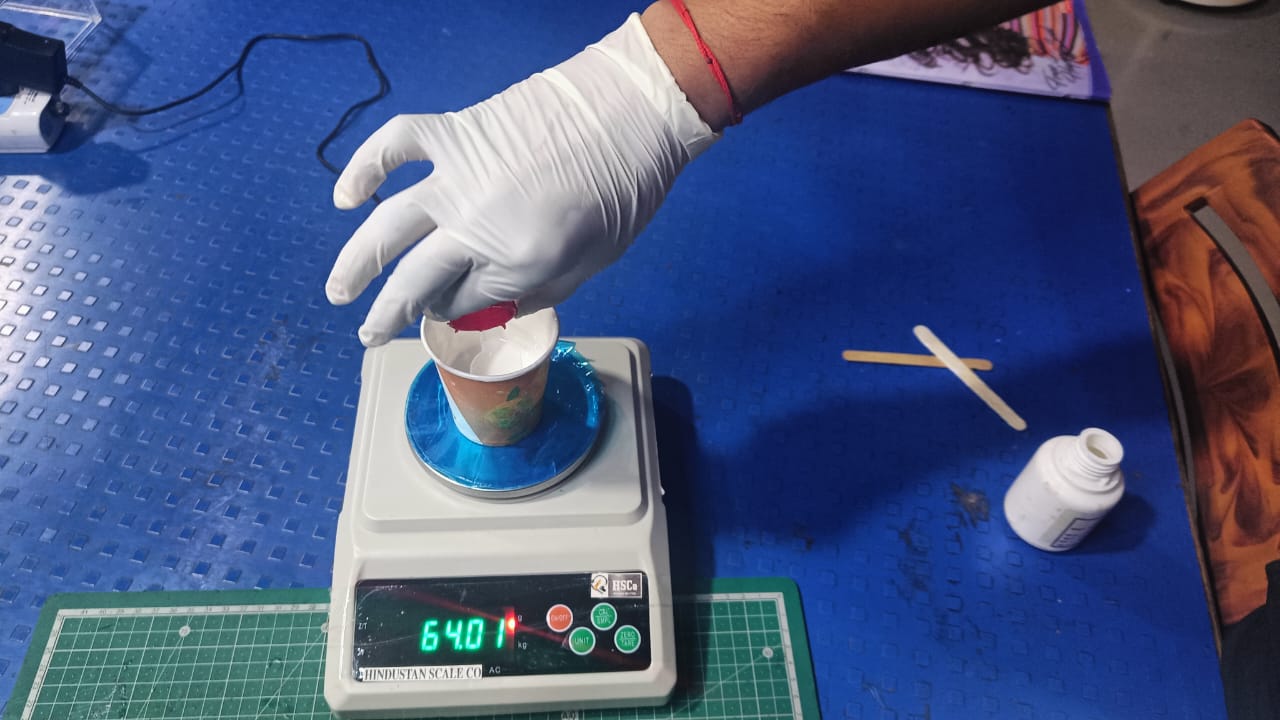
measure the wieght of cup and do it zero. after that I take silicon rubber in it and weight it.
Then I measure the weight for Catalyst(Material B) and weight it.
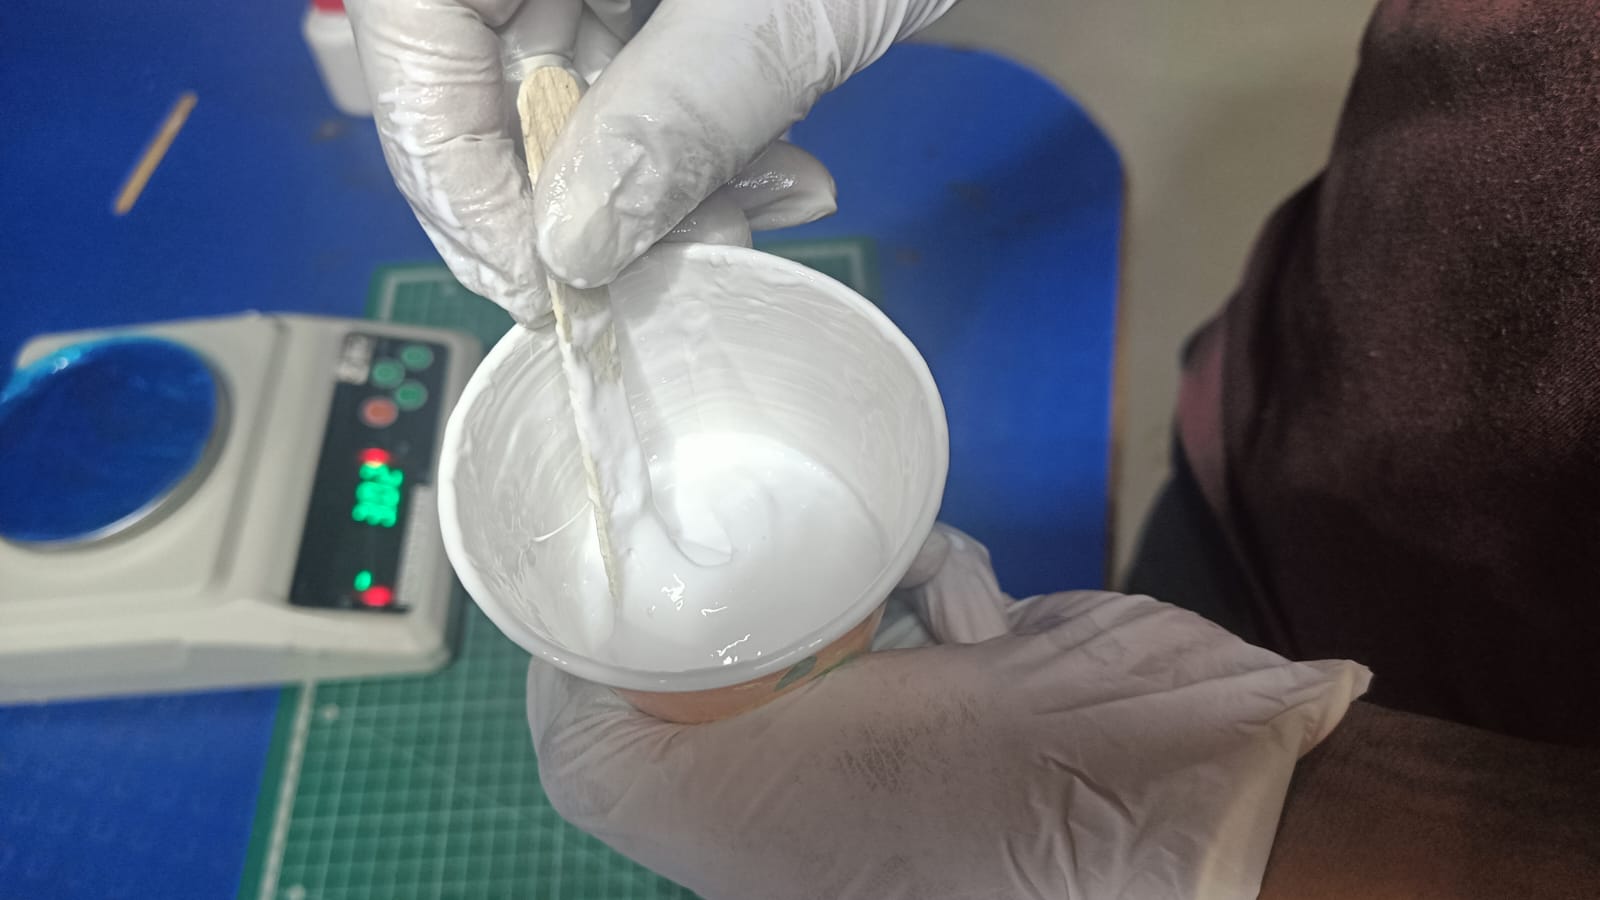
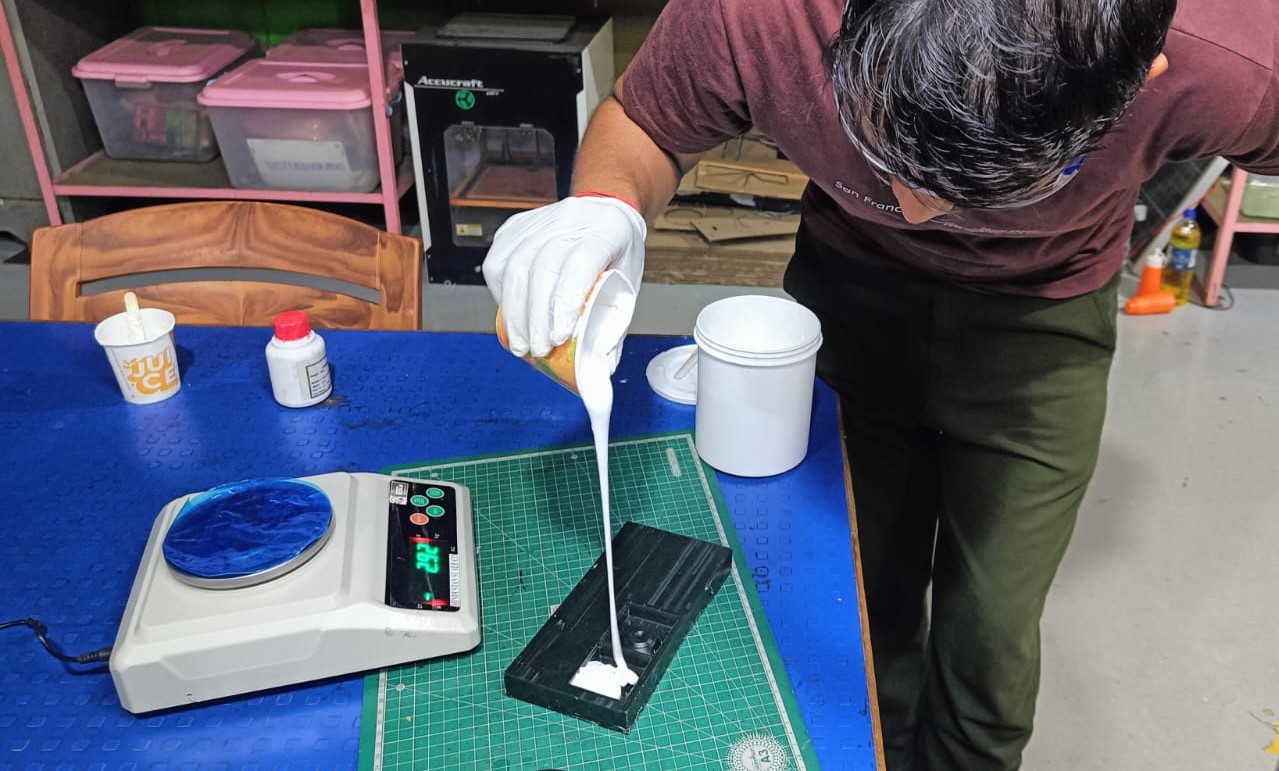
After that I mix them well and pour ready mix inside the wax material.
 <
<
After proper cure time my mold is ready to cast. there are some bubbles are there so I decided to repair the mold by Wax.
Casting Process
Now the mold size is about 43mm*43mm*13mm and there is two part so I calculate the volume required for the casting material.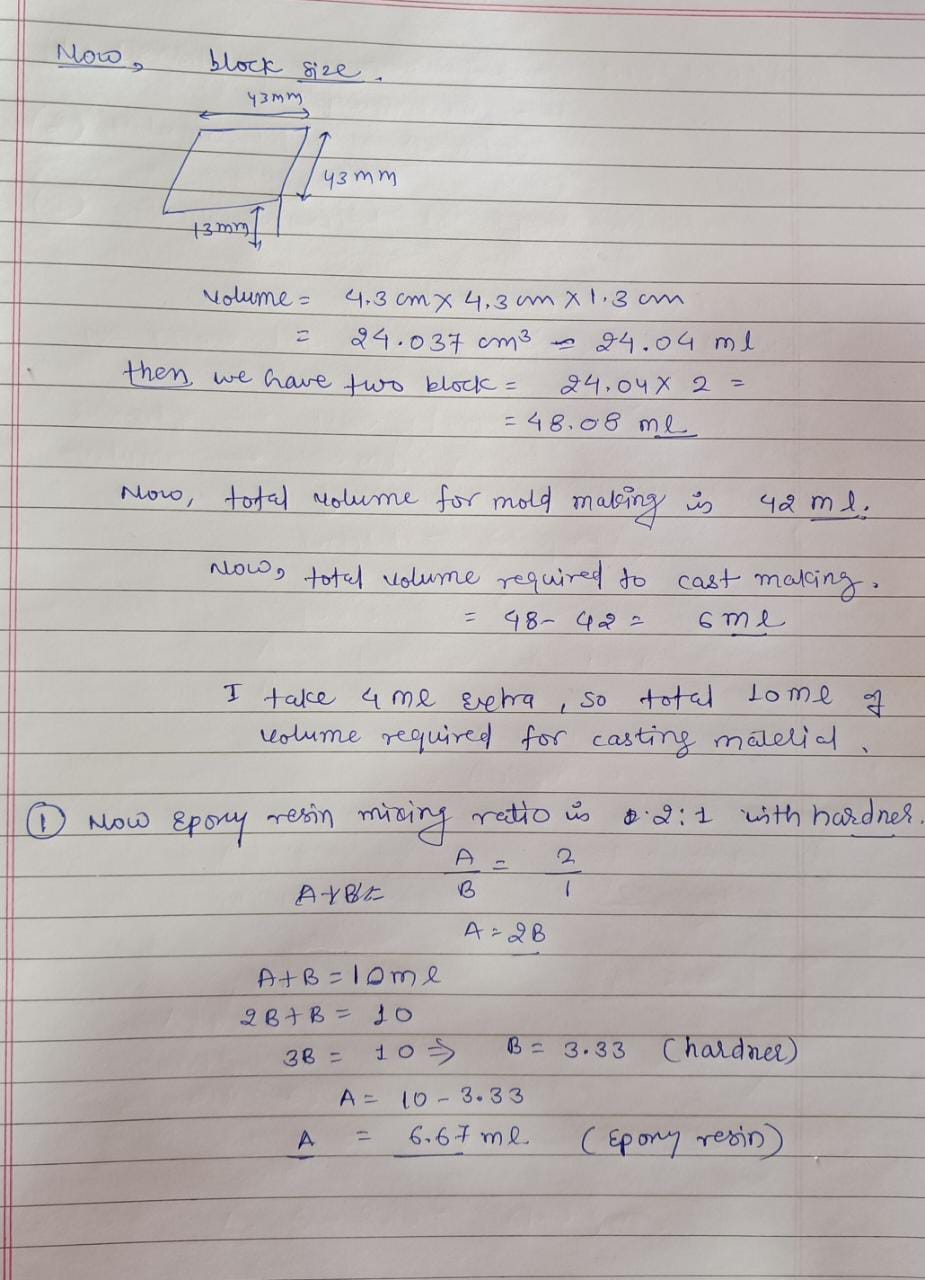
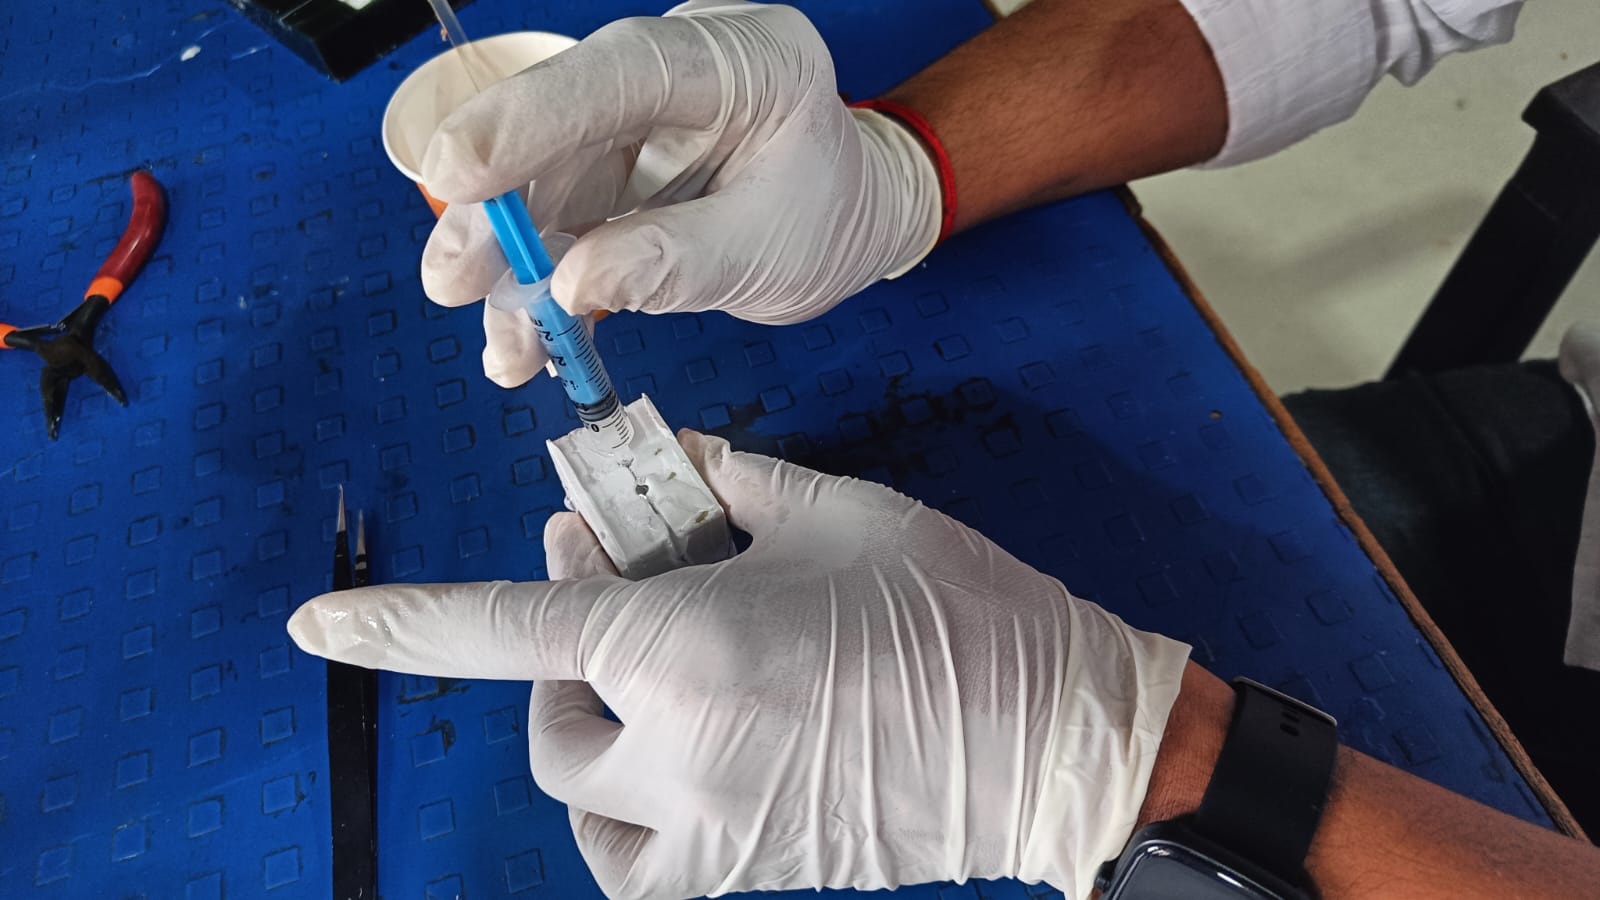
Now I weight the Epoxy resin about 6.67 ml and hardner about 3.33 ml and mix them properly. After That I pour them into the mold. I sealed the mold by glue gun
and pour the epoxy resin by used of Injection
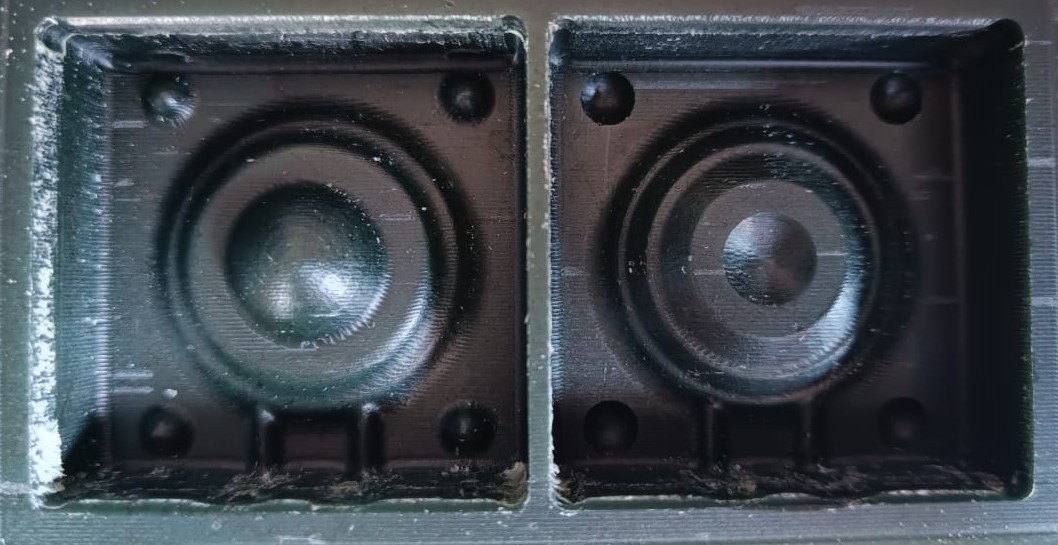
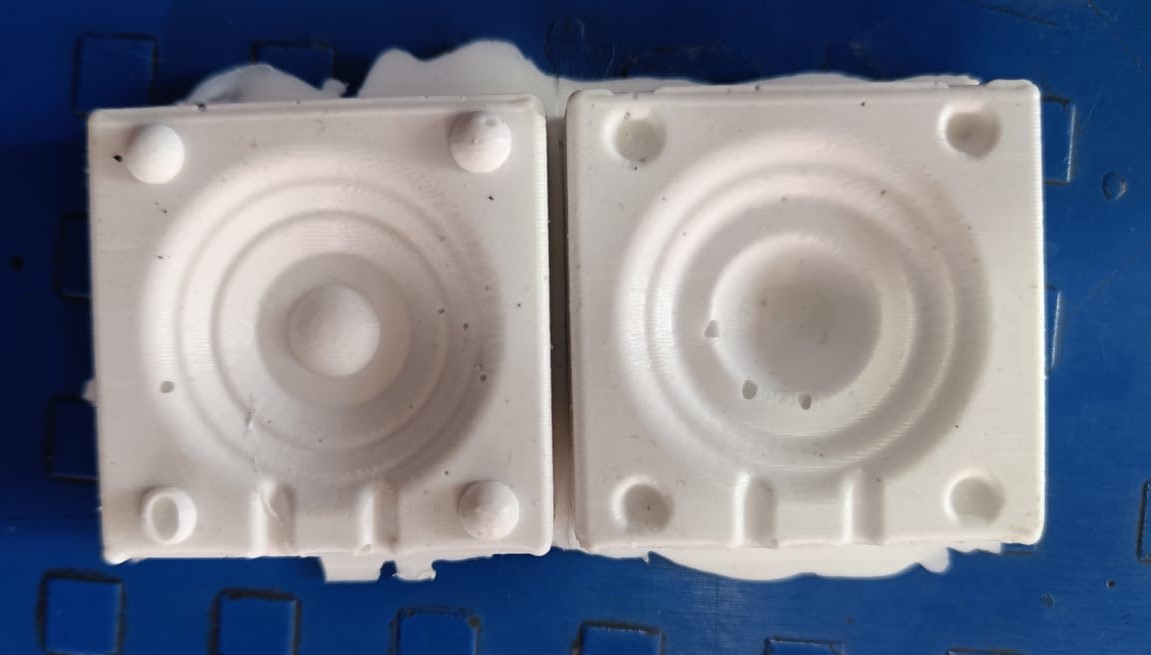
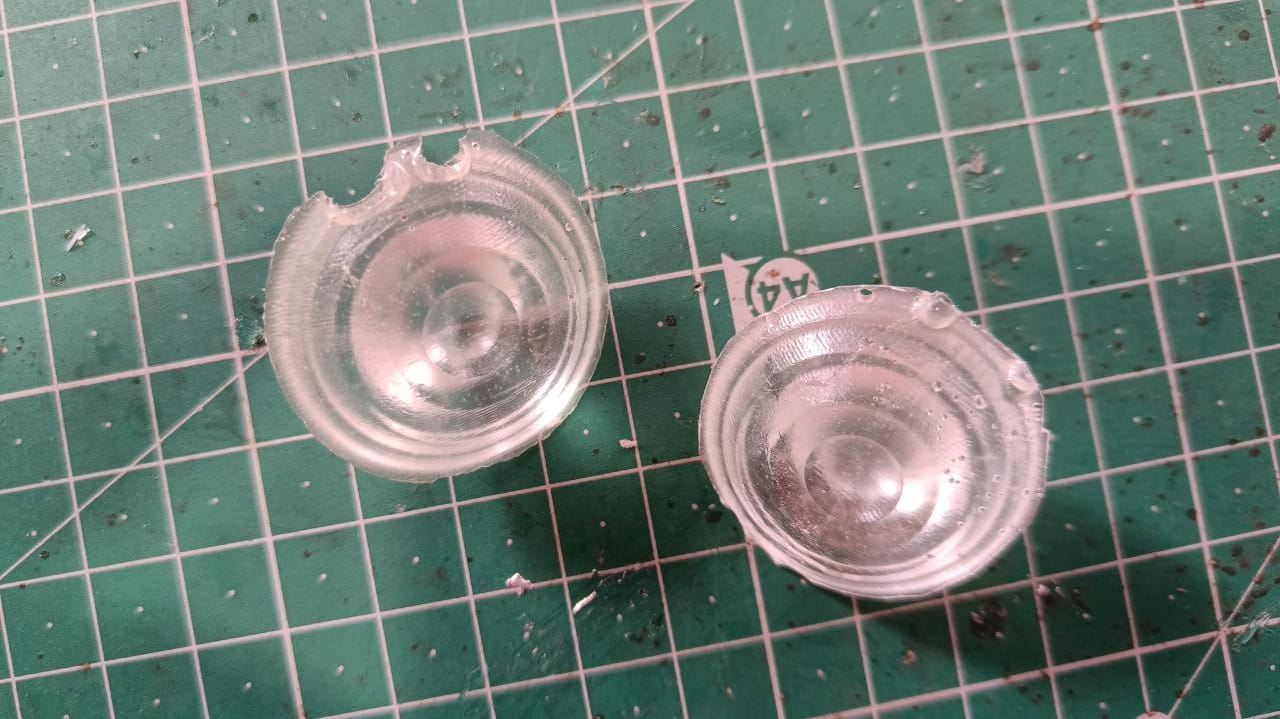
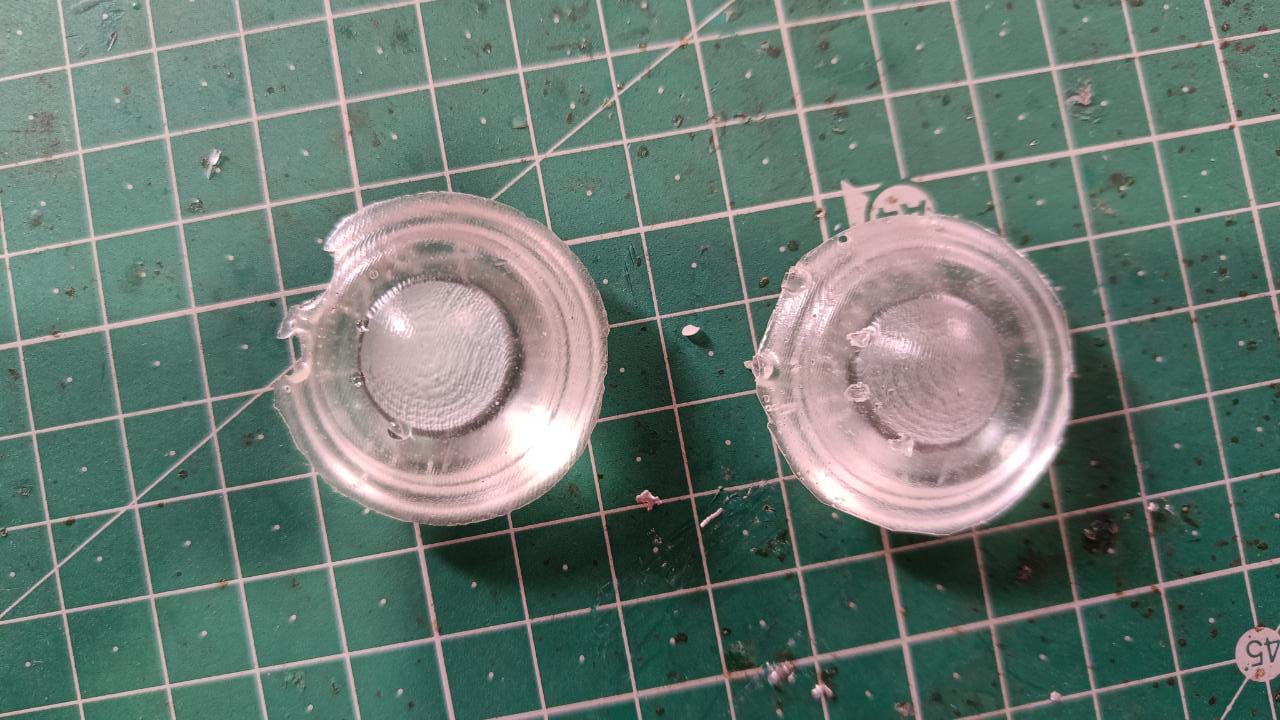
After 24 hour my casting is ready. Ijust removed the mold and find that the design is not perfectly cast but it overall lokking good.
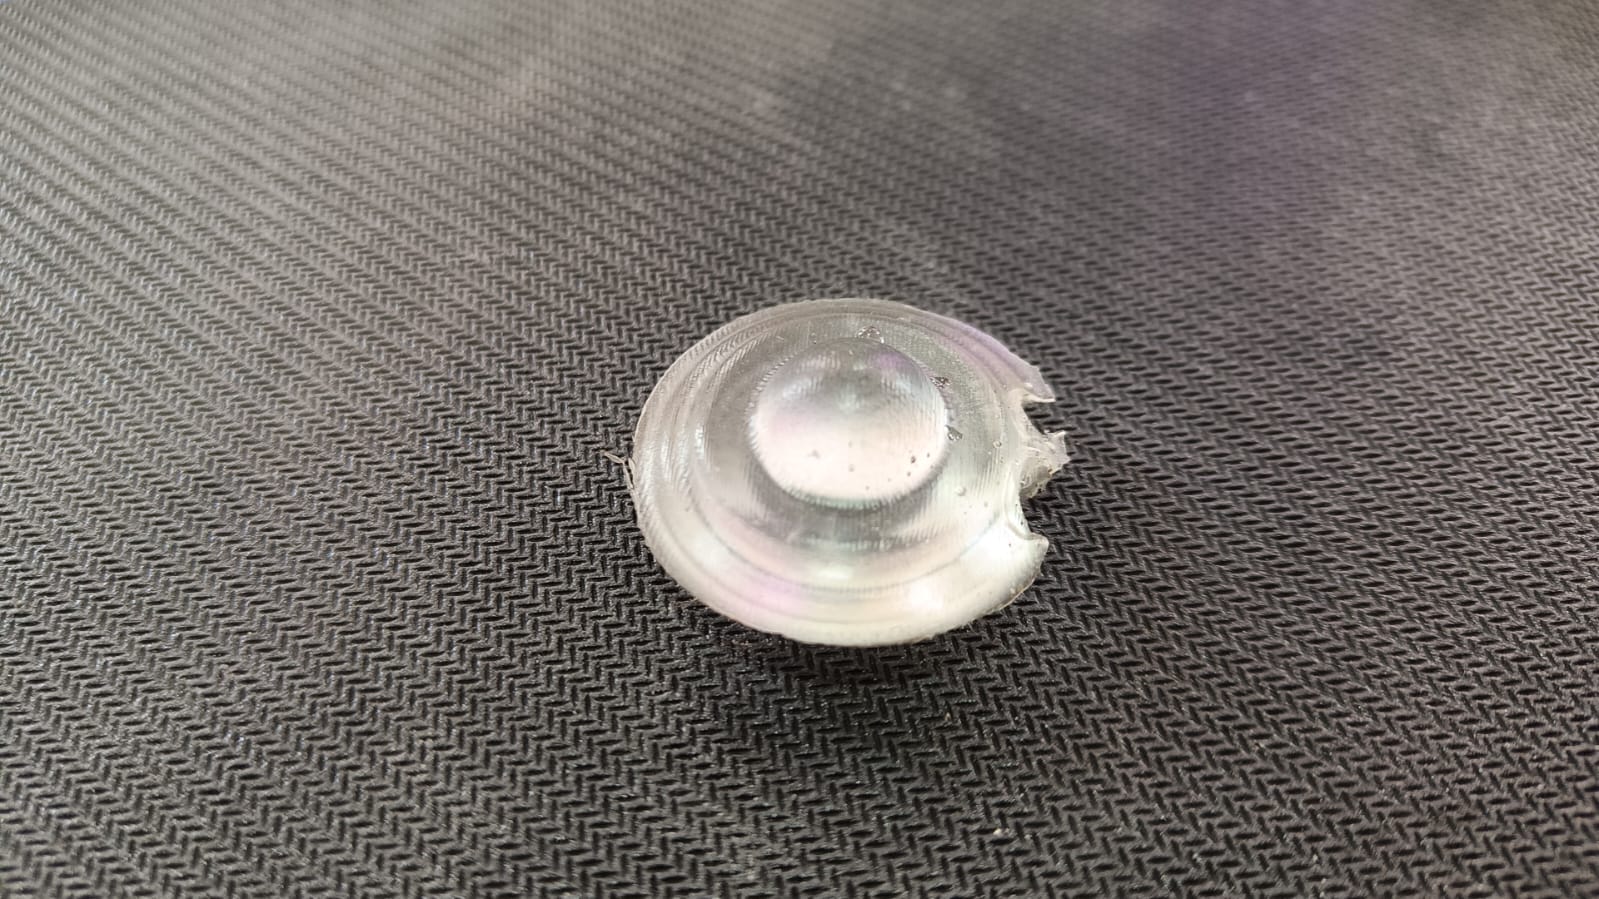
Then I make another one and here is the result. You can caompare both.
Learning outcomes
-I learned about different the Molding and casting material-I learned about how to mix them in proper ratio
-I learned about the mold casing making process also learned about how to generate tool path by using Modela player 4.
-I properly mix them and make a mold by using moldsil.
-I successfully cast the design by using epoxy resin
What went well
- Mixing of material at proper ratio are going wellIssue Faced
- When i give tool path to machine it stop after some time. it is due to my computer. when my computer go in sleep mode machine woring stopped .- At certain depth my tool holder start rubbing with the wax material and machine gone stopped. Then I set the tool height according to my design Depth
- I get some bubbled in mold. Then I repair them by wax.
Download the all original file
Download FileClick here to know more about group Assignment.